RightHandTrackerTutorial
-
To install jnect follow the steps described in Installation. For this tutorial it is sufficient to install the Jnect API Feature.
-
In order to create a new plugin right click in Package Explorer -> New -> Other... -> Plug-in Development -> Plug-in Project
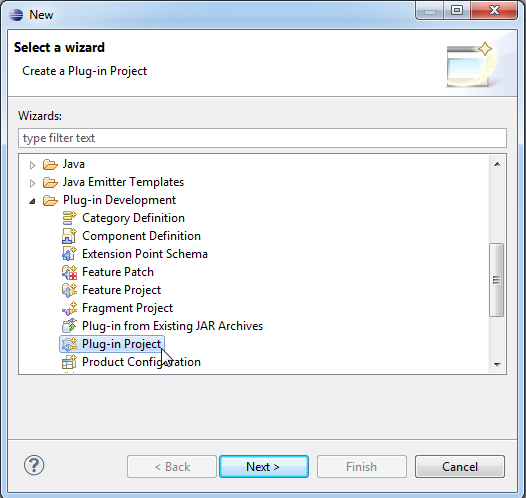
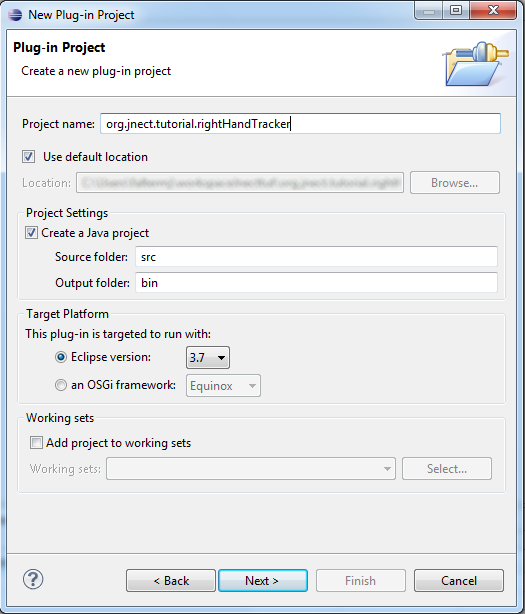
Enter a project name, click next and then on finish.
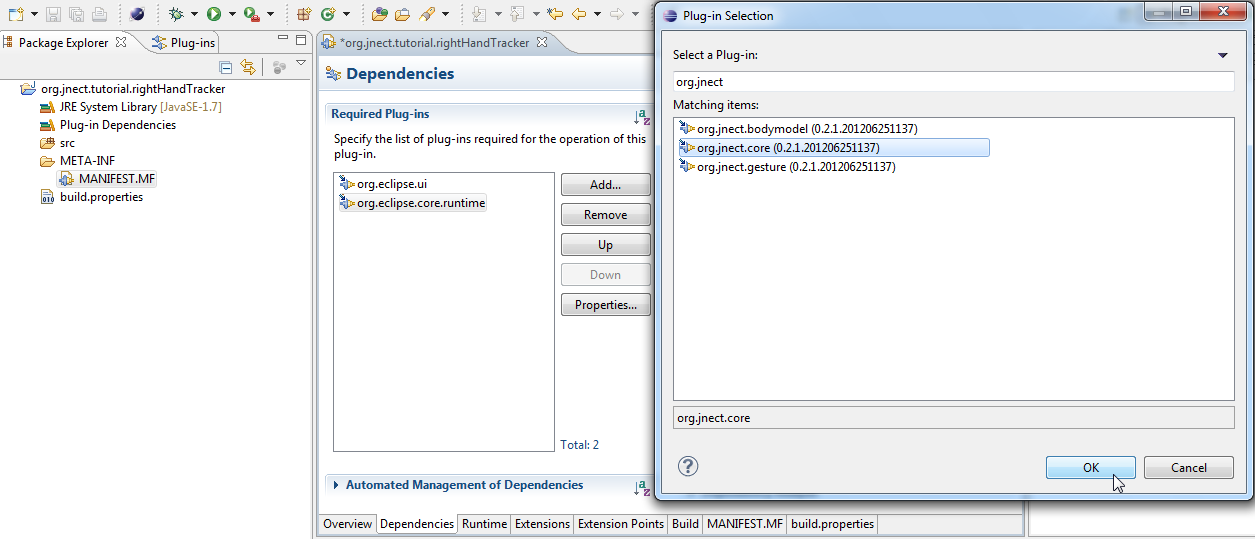
- Our plugin is going to use jnect. To achieve this open the MANIFEST.MF in the META-INF directory and go to Dependencies. Click on Add... and search for org.jnect.core. Select it and click OK. We are now able to use the funcionality of the org.jnect.core plugin.
- Our application is going to print the current location of the right hand to the console everytime a position change is detected by the Kinect. In order to do this we will create a class with two methods. printRightHandPosition() will start the Kinect and the skeleton tracking. Moreover it registers an adapter to the right hand which will print the location everytime notifyChanged is called. The stop()-method will only stop the Kinect.
The KinectManager is the mighty singleton control unit in jnect which offers all important calls to control the Kinect.
package org.jnect.tutorial.righthandtracker;
import org.eclipse.emf.common.notify.Adapter; import org.eclipse.emf.common.notify.Notification; import org.eclipse.emf.common.notify.Notifier; import org.jnect.bodymodel.RightHand; import org.jnect.core.KinectManager;
public class RightHandTracker {
    public static RightHandTracker INSTANCE = new RightHandTracker();

    private RightHandTracker() {
    };

    public void printRightHandPosition() {
            KinectManager.INSTANCE.startKinect();
            KinectManager.INSTANCE.startSkeletonTracking();
            final RightHand rightHand = KinectManager.INSTANCE.getSkeletonModel()
                            .getRightHand();
            rightHand.eAdapters().add(new Adapter() {
                    @Override
                    public void notifyChanged(Notification notification) {
                            System.out.println("x: " + rightHand.getX() + "| y: "
                                            + rightHand.getY() + "| z: " + rightHand.getZ());
                    }

                    @Override
                    public Notifier getTarget() {
                            return rightHand;
                    }

                    @Override
                    public void setTarget(Notifier newTarget) {
                            // TODO Auto-generated method stub
                    }

                    @Override
                    public boolean isAdapterForType(Object type) {
                            // TODO Auto-generated method stub
                            return false;
                    }
            });
    }

    public void stop() {
            KinectManager.INSTANCE.stopKinect();
    }
} 5. We are going to add a Start/Stop Button to the Menu to invoke the right hand tracking. First we need to create a Handler which will be called, when the button is clicked. The Handler will check the current state and calls the methods in RightHandTracker accordingly:
package org.jnect.tutorial.righthandtracker.handler;
import org.eclipse.core.commands.AbstractHandler; import org.eclipse.core.commands.ExecutionEvent; import org.eclipse.core.commands.ExecutionException; import org.jnect.tutorial.righthandtracker.RightHandTracker;
public class StartStopHandler extends AbstractHandler {
    private static boolean STARTED = false;

    @Override
    public Object execute(ExecutionEvent event) throws ExecutionException {
            if (!STARTED) {
                    RightHandTracker.INSTANCE.printRightHandPosition();
                    STARTED = true;
            } else {
                    RightHandTracker.INSTANCE.stop();
                    STARTED = false;
            }

            return null;
    }
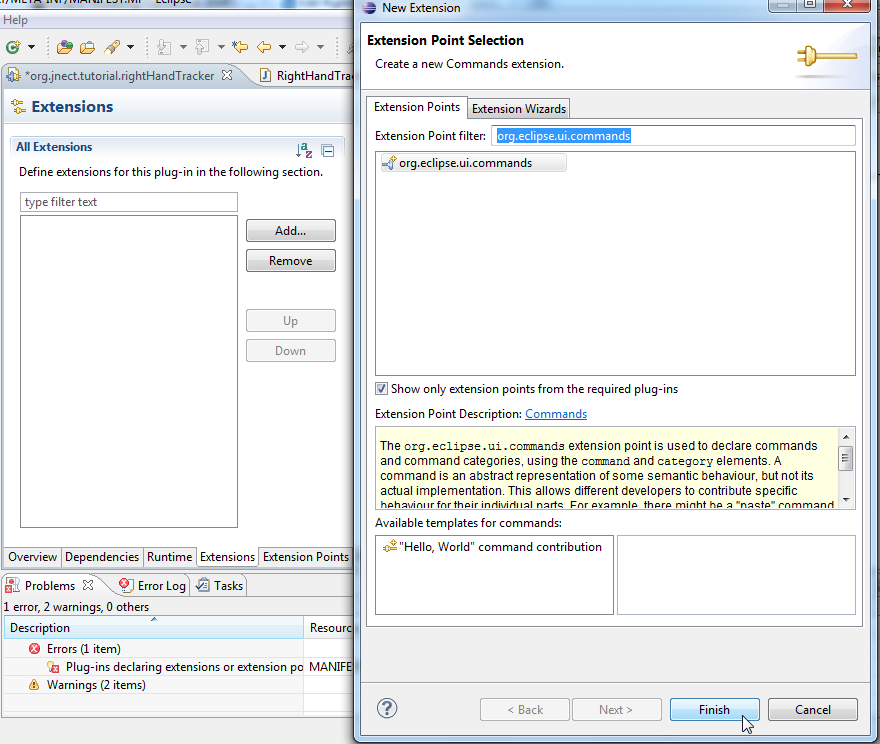
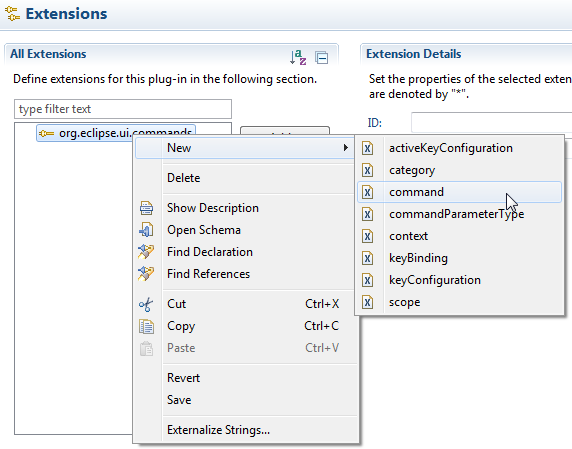
} 6. Now we're going to add the button to the menubar. Open the MANIFEST.MF again and go to Extensions. Click on Add... and search for org.eclipse.ui.commands in the Extension Point Filter. Select it and click on Finish.
Right click on org.eclipse.ui.commands and create a new command.
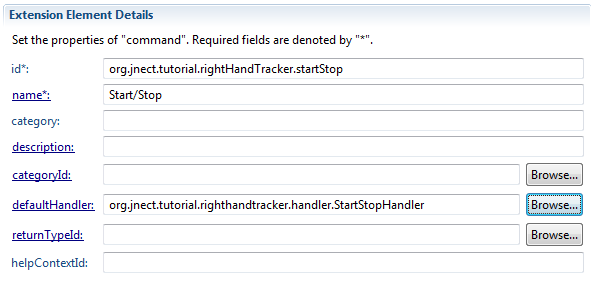
Enter id, name and select the defaultHandler.
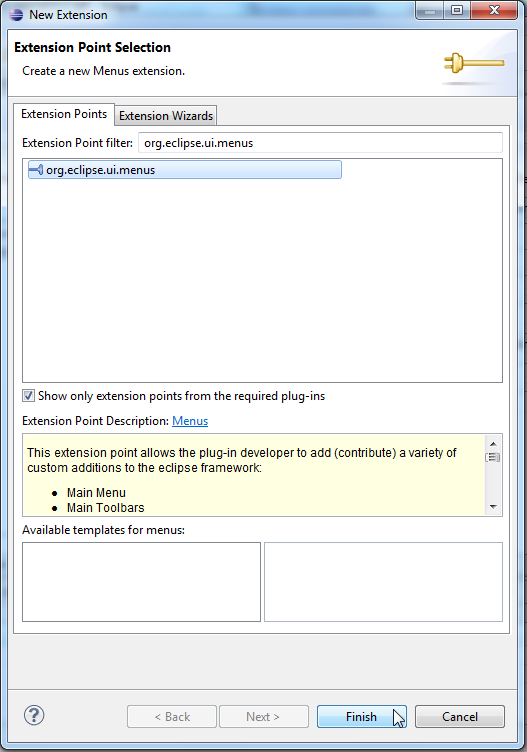
Now click on Add... again and select org.eclipse.ui.menus.
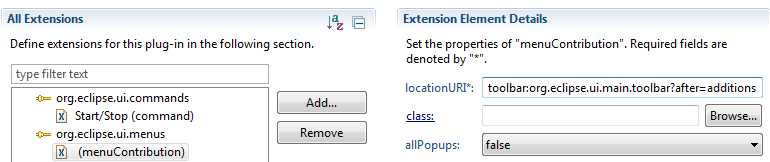
Right click, create a new menuContribution and enter the following locationURI:
Right click on the menuContribution, create a new toolbar and enter an id:

Right click on the toolbar, create a new command and enter the id of our earlier created command as commandId:

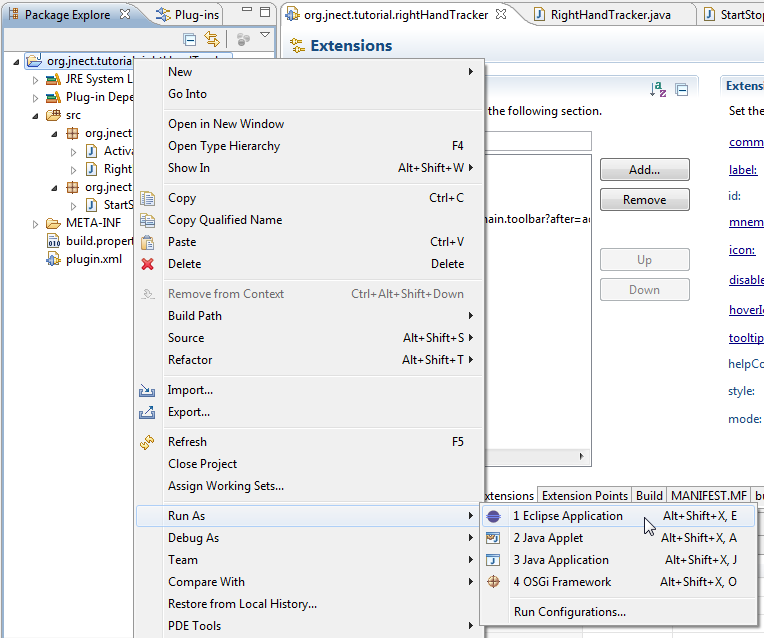
- That's it! Right click on your project and run it as an Eclipse Application. Click on Start/Stop.
Note that the position changes are not printed to the console of the new Eclipse instance, but to the old one!