flipdisplay.mp4
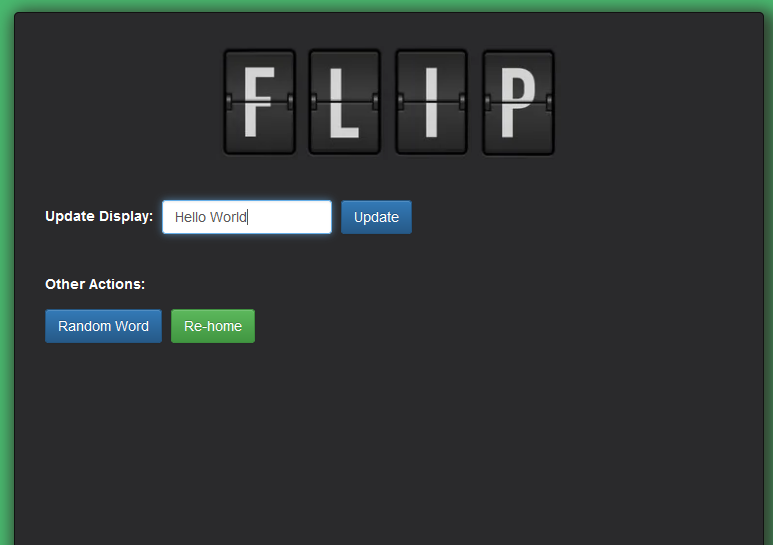
This is a 3D-printed flip character display. Each character utilizes a position sensor for loop detection in order to ensure accuract positioning of character display. The display is capable of a few different animation styles, e.g. all arriving at the same time, or cascading left-to-right. It has a simple web-based UI and API, and is fairly easy to construct.
The ESP32 hosts a web server that serves a simple web page and API that allows you to update the display.
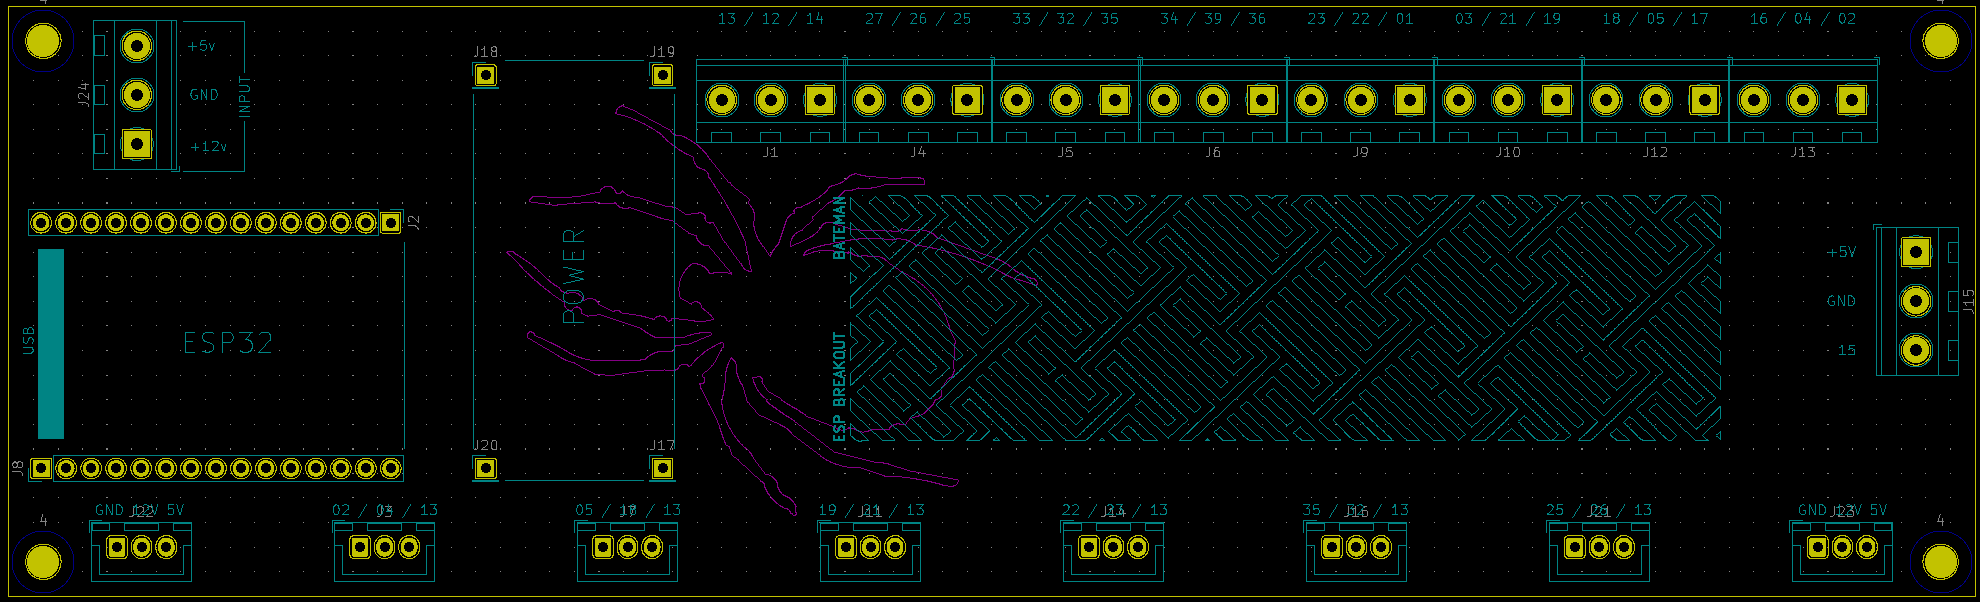
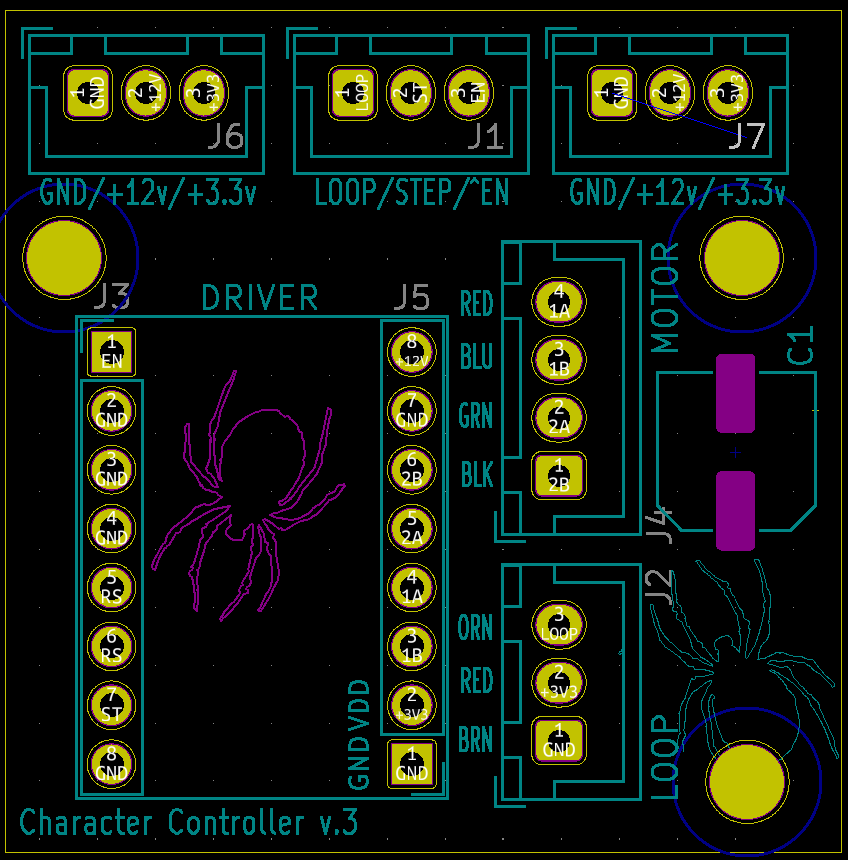
There are only a few different major components: A buck convertor, an ESP32, and an A4988 Motor driver (per character)
The main panel is used as the power bus and ESP32 break out. It connects each motor step pin and loop detection button pin to an individual GPIO pin, and connects all driver enable pins to a single GPIO pin. There is also a section for screw terminals for easy access to all ESP32 pins, as well as power.
One motor panel exists per character. This acts as the interface between the A4988 Motor Driver, the motor, and the ESP32.
The character models are designed to be nested against one another and to minimize the distance between characters as much as possible.
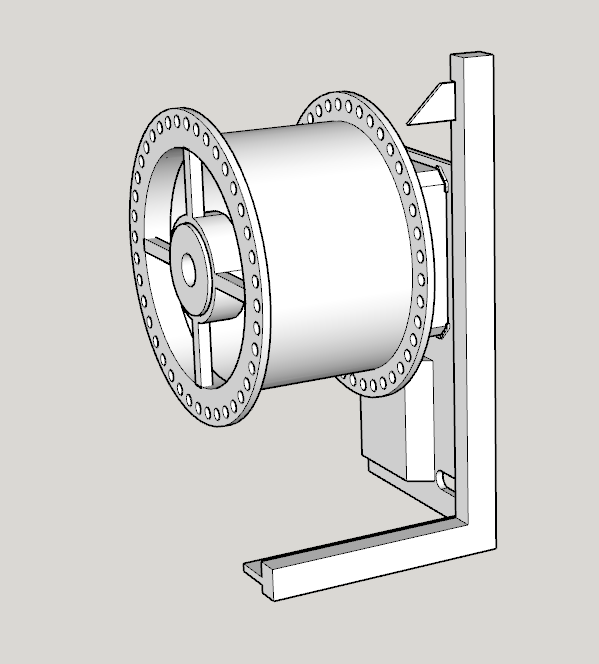
The barrel and the stator connect to one another, and the flaps are placed within the holes.
A motor is mounted to the bracket. The button holder is connected to the two front bottom holes on the motor and a leaf switch button is glued on. The barrel assembly is connected to the motor with a coupler so that it rotates around the motor housing. A stopper is fastened into the top of the bracket, which is used to stop the letters at a certain position
The circuit assembly is just used to house the individual PCBs.
Originally inspired from designs by hakernia on Thingiverse, but I found that the small motor was not driving well, as it'd get hot and fail, or get stuck easily. So I upgraded to heavier duty Nema17 Motorslike the ones used in 3D Printers and decided to use an actual coupler to connect the 3d printed parts to the motor.
A 6 character Flip Display will cost about $170.00 USD for all the raw materials, then additional costs based on your enclosure.
Filament: $40.00 USD
Electronics: $100.00 USD
PCBs: $30.00 USD
All models were printed using MatterHackers Build Series PLA on a Creality 10s Pro V2.
| Part | Supply | Cost | Count |
|---|---|---|---|
| Black PLA | MatterHackers | $19.00 | 1 |
| White PLA | MatterHackers | $19.00 | 1 |
Electronics and hardware were sourced through a few different providers.
| Component | Part | Supply | Cost | Count |
|---|---|---|---|---|
| - | 12v Power adaptor | Amazon | $19.00 | 1 |
| Main | Buck Convertor | Amazon | $1.50 | 1 |
| Main | ESP32 | Amazon | $7.00 | 1 |
| Main | Panel Mount Micro USB Extension | Amazon | $11.00 | 1 (optional) |
| Main | 15 Pin Header | Tayda | $0.12 | 2 |
| Main | Screw Terminal | Tayda | $0.14 | A bunch |
| Motor | Nema17 Stepper Motor | Amazon | $7.40 | 1 per character |
| Motor | A4988 Motor Driver | Amazon | $1.40 | 1 per character |
| Motor | Coupler | Amazon | $0.90 | 1 per character |
| Motor | 10mm x 26mm x8mm Bearing | Digikey | $0.85 | 1 per character |
| Motor | Leaf Switch | Mouser | $1.33 | 1 per character |
| Both | DC Power Jack | Tayda | $0.13 | 1 |
| Both | 8 Pin Header | Tayda | $0.08 | A bunch |
| Both | 2 Pin JST Connector | Tayda | $0.01 | A bunch |
| Both | 3 Pin JST Connector | Tayda | $0.02 | A bunch |
| Both | 5 Pin JST Connector | Tayda | $0.03 | A bunch |
All PCBs were printed using JLCPCB.
| Part | Supply | Cost | Count |
|---|---|---|---|
| Main PCB | JLCPCB (requires SMT assembly) | $9.00 | 1 |
| Motor PCB | JLCPCB | $1.70 | 1 per character |