🇩🇪 Developed in Germany 🇩🇪
This repository contains the source code and deployment configurations for "Public Notes," a full-stack, containerized web application designed for creating and managing public notes. This project serves as a comprehensive, hands-on demonstration of cloud computing principles, DevOps methodologies, and best practices in application deployment. It showcases the entire lifecycle of a cloud-native application, from local containerized development to scalable orchestration in a production-simulated environment.
|
|
This project is a key deliverable for the Cloud Computing discipline at the Hochschule für angewandte Wissenschaften Hof. It represents the practical application and synthesis of the core concepts covered throughout the course. |
- Containerization (Docker): The application and its dependencies are packaged into lightweight, portable containers using Docker. This ensures consistency across different environments and simplifies the deployment process.
- Multi-Container Orchestration (Docker Compose): For local development and testing, Docker Compose is used to define and manage the multi-container application, including its services, networks, and volumes, through a single declarative YAML file.
- Cluster Orchestration (Kubernetes): To simulate a production-grade deployment, the application is deployed to a Kubernetes cluster managed by Minikube. This demonstrates proficiency in scalable container orchestration, service discovery, and lifecycle management.
- Load Balancing & Reverse Proxy (HAProxy): HAProxy serves as the single entry point for all incoming traffic, providing reverse proxy capabilities to secure and decouple the backend services from the public internet.
- Application Backend (Python/Flask): The core application logic is built using Python with the Flask micro-framework, handling web requests, business logic, and communication with the data layer.
- Data Persistence (PostgreSQL): A PostgreSQL database is used for the persistent storage of application data. The use of Docker volumes ensures that data integrity is maintained even if the database container is recreated.
The development of this application was guided by a formal set of technical objectives designed to showcase a comprehensive understanding of cloud infrastructure design. The primary requirements were as follows:
- Objective 1: Multi-Tier Architecture: Design and implement a classic two-tier application architecture, a web application server (logic tier and presentation tier), and a database server (data tier).
- Objective 2: Containerization: Encapsulate each architectural tier (HAProxy, Web Application, PostgreSQL Database) into its own portable and isolated Docker container, enabling modularity.
- Objective 3: Secure Networking: Implement a secure network topology using isolated Docker networks. The design must ensure that the web server and database communicate on a private, backend network that is completely inaccessible from the public-facing load balancer network.
- Objective 4: External Accessibility: Expose the application to the host machine and the public exclusively through the load balancer's standard web port (port 80), hiding the internal services and ports.
- Objective 5: Deployment Automation: Utilize Docker Compose to define, build, and run the entire multi-container infrastructure. This allows for the entire application stack to be launched with a single, reproducible command.
- Objective 6: Scalable Deployment Simulation: Replicate the complete infrastructure within a local Kubernetes cluster (using Minikube). This final step demonstrates the ability to transition the application from a local development setup to a scalable, production-ready orchestration platform.
The application is structured according to the time-tested three-tier architectural model, which separates concerns into logical and physical layers. This separation enhances maintainability, scalability, and security.
|

|
A cornerstone of this project's architecture is its secure networking topology, which is implemented using a dual-network design within Docker Compose. This approach is a practical application of the defense-in-depth security principle, creating multiple layers of protection around the most sensitive asset: the database.
frontend-network: This network connects the public-facing HAProxy container to the Flask web application container. It acts as a semi-trusted zone where the load balancer can forward legitimate user traffic to the application server.Abackend-network: This is a completely isolated, private network that connects only the Flask web application container to the PostgreSQL database container.
The security implications of this design are significant. The database container has no network route to the outside world and is not attached to the frontend-network. Therefore, an attacker cannot connect to the database directly. This multi-step requirement dramatically reduces the application's attack surface and makes a successful breach significantly more difficult, demonstrating a mature approach to cloud security.
The following images demonstrate the core functionalities of the Public Notes application.
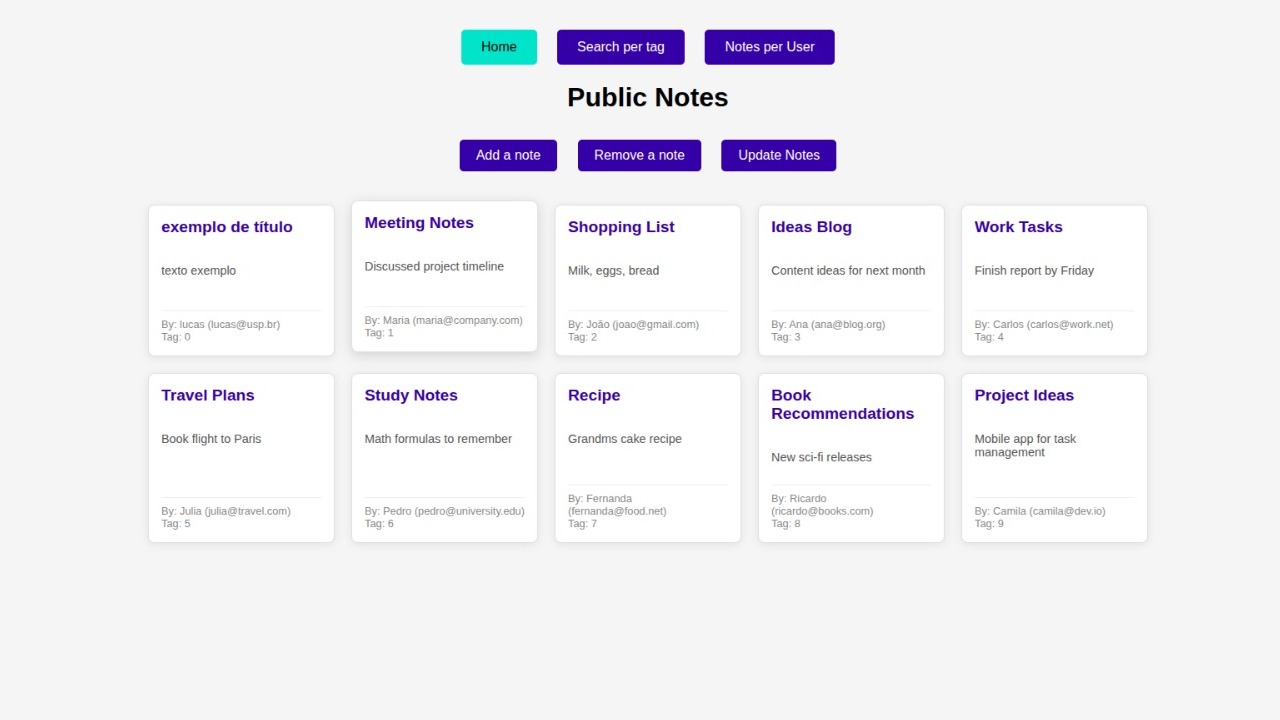
Caption: The main dashboard provides a consolidated view of all existing notes and serves as the central hub for accessing other features.

Caption: A search function allows users to filter the notes based on tags, making it easy to find relevant information quickly.

Caption: For multi-user contexts, notes can be filtered by the creator's email address, allowing for personalized views of the data.

Caption: Easily add new notes through a simple and intuitive interface.

Caption: The application allows users to remove notes directly from the interface.
This section provides detailed, step-by-step instructions for cloning the repository, setting up the necessary environment, and deploying the application.
Before you begin, ensure you have the following software installed on your system. It is highly recommended to follow the official installation guides for each tool.
- Git
- Docker Engine & Docker Compose
- Minikube
- kubectl
-
Clone the repository:
git clone https://github.com/LucasDuarte026/cloud_computing.git
-
Navigate to the project directory:
cd cloud_computing/project/public-notes
This method uses the docker-compose.yml file to automatically build images, configure networks, and launch all services.
Execution Steps:
-
Build and Launch: From the
project/public-notesdirectory, run the following commands.docker compose build docker compose up -d
-
Access the Application: Open your browser and navigate to
http://localhost.
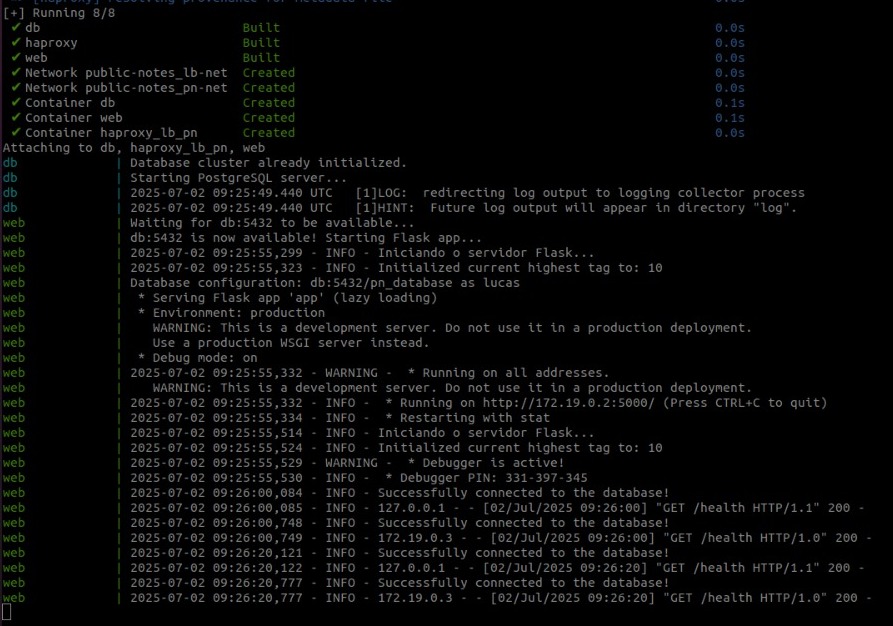
Caption: Example output after successfully launching the application with Docker Compose.
This deployment method demonstrates how to run the application in a local Kubernetes cluster, simulating a production-grade, scalable environment. This approach transitions the application from a simple multi-container setup to a powerful orchestration platform. All necessary Kubernetes manifest files are located in the k8s/ directory.
Prerequisites & Setup:
-
Install Kubernetes Tools: If you haven't already, install Minikube (for a local cluster) and kubectl (the command-line tool for interacting with the cluster).
-
Set Docker Environment: To allow your local machine to build Docker images directly within Minikube's environment, run the following command. This crucial step enables the cluster to find the locally built images without needing an external container registry.
# For Linux/macOS
eval $(minikube -p minikube docker-env)

# For Windows PowerShell
# & minikube -p minikube docker-env | Invoke-Expression
Note: You must run this command in the same terminal session you'll use for the next steps.
Execution Steps:
-
Apply Kubernetes Manifests: Navigate to the root project directory (
project/public-notes) and use run the scrip file inside it to configurate all needed to run with minikube. These files define the deployments, services, persistent volumes, and secrets required to run the application on Kubernetes.bash ./kubernetes/launch_config.sh
This single command orchestrates the creation of all necessary Kubernetes resources.
-
Verify the Deployment: Check the status of your pods and services to ensure everything is running correctly. It may take a minute or two for all containers to start.
kubectl get pods
kubectl get services
You should see pods for haproxy, the flask-app, and postgres in the
Runningstate. -
Access the Application: To access the application, use the
minikube servicecommand. This command automatically creates a network tunnel to thehaproxy-servicewithin the cluster and opens the application's URL in your default web browser.minikube service haproxy
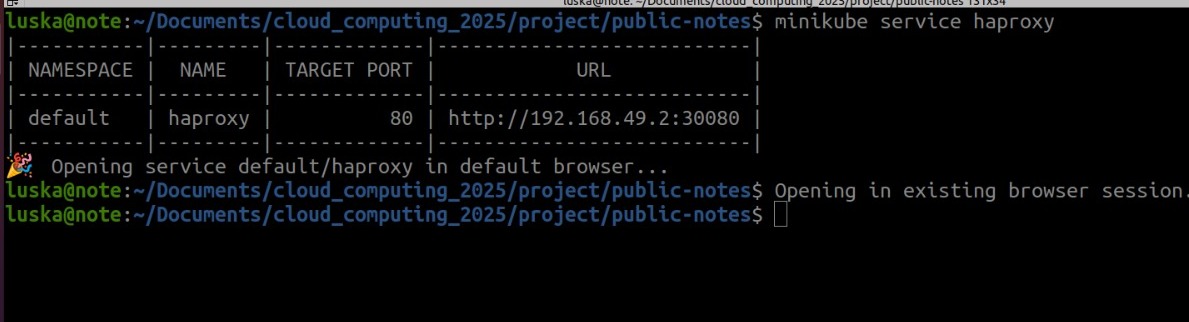
Caption: Verifying the successful deployment of pods within the Minikube cluster.
This project successfully fulfills all its objectives, from creating a multi-tier architecture to deploying it on two distinct, industry-standard platforms: Docker Compose and Kubernetes. It serves as a practical, hands-on guide that bridges the gap between local development and cloud-native orchestration. The secure networking strategy and automated deployment scripts demonstrate key DevOps and cloud security principles, providing a solid foundation for building and managing modern, scalable web applications.