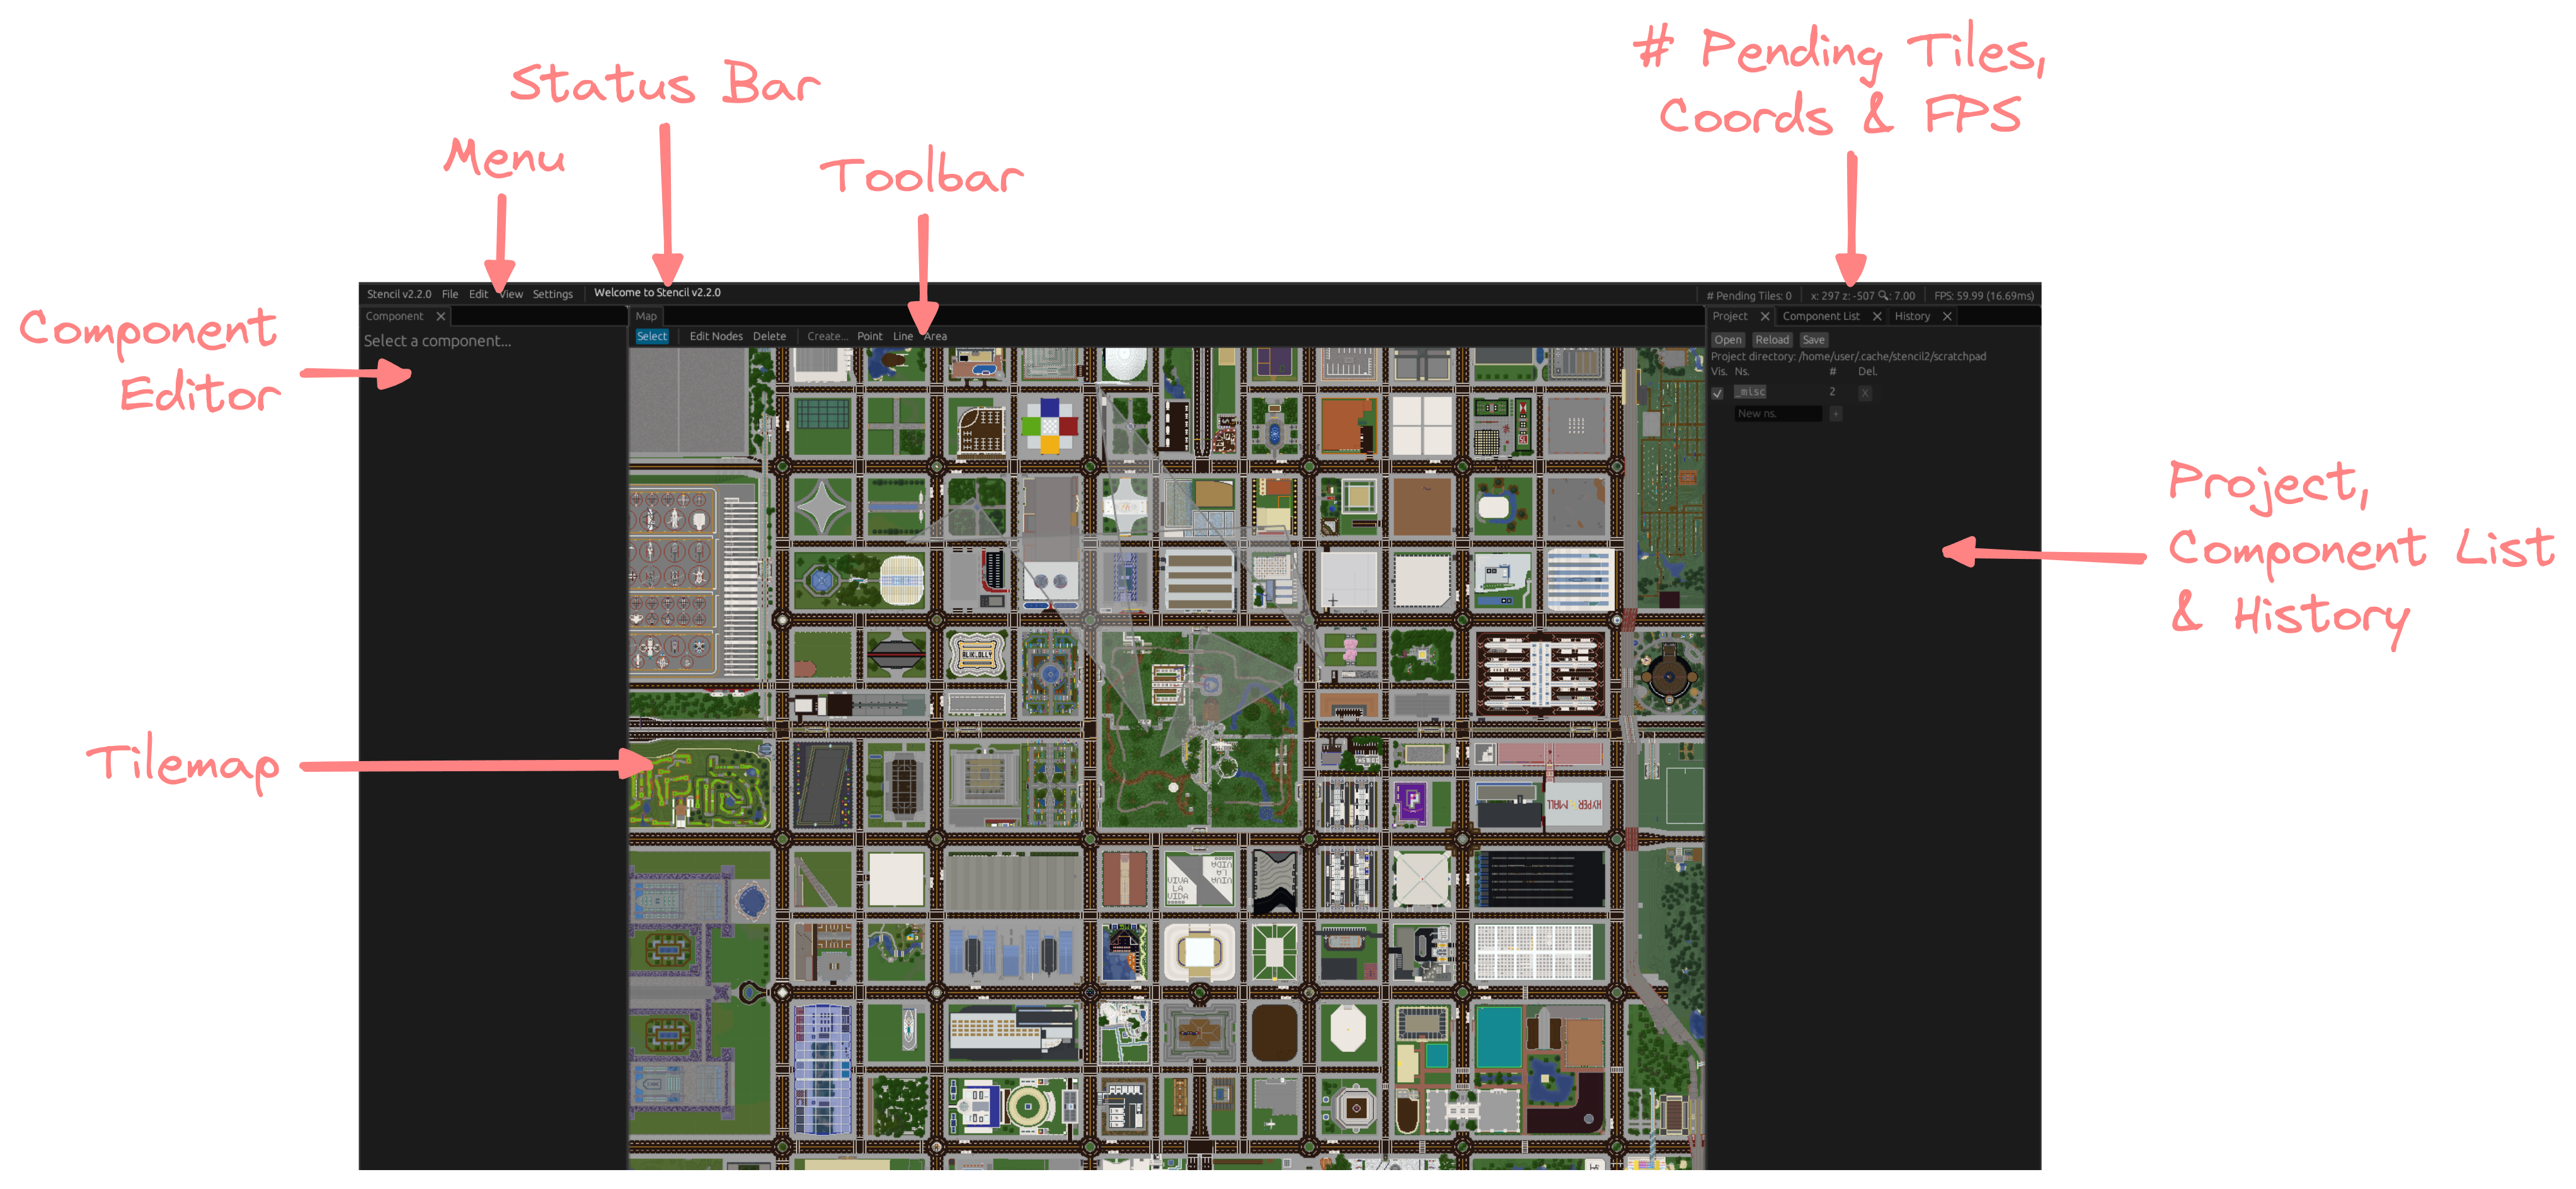
Basics
- Under
Projecton the right panel, clickOpenand select a folder with PLA files in it (or a new folder) - A list of namespaces will be loaded along with the default namespace
_misc
- Under
Projecton the right panel, input the namespace's name and click+ - Remember to do this before adding anything to the namespace, in case you forget (it does not have a way to mass-move components between namespaces yet)
- Click
Pointon the toolbar or press4on the keyboard - Left-click on the map where you want your point to be
- Click
Lineon the toolbar or press5on the keyboard for lines; or - Click
Areaon the toolbar or press6on the keyboard for areas - Left-click on the map where you want the line/area to start. This is your first node
- Continue left-clicking to place more nodes and continue the line/area
- Hold down the left
altkey for angle-snapping
- Hold down the left
- If you had made a mistake with the previous node, left-click on the previous node to remove it
- Right-click to complete the line/area at the last node placed
- For areas, left-clicking on the first node completes it too
- Click
Selecton the toolbar or1on the keyboard, then left-click the component you want to edit
- A panel of text boxes and sliders should appear on the left of the screen
-
ns.is the namespace that the component belongs to. It should be a three-letter code that your project organisers have assigned, or that you have registered- If you have just created a namespace, remember to set it (before)
- This field should be automatically prefilled the next time you edit a component's information
-
idshould be prefilled automatically with a randomly-generated ID -
Displayed asis the text that would appear on the final map -
Descriptionis a brief description of the component -
Component typeis what the component would show up as on the final map -
Tagsis a comma-separated list of tags on the component- e.g.
oneWaymakes a line one-directional
- e.g.
-
Layercontrols whether the component appears below or above other components - In lines,
Reverse directionreverses the order of the nodes. This is useful for one-directional components - A list of coordinates is shown as well below the information fields
- In lines, the green coordinate points to the start of the line and the red coordinate points to the end of the line. Both these coloured coordinates point to coloured handles on the component on the tilemap
-
- Right-click and drag the component to move it
- Click
Edit Nodeson the toolbar or2on the keyboard - For the large circles:
- right-click and drag to move the node
- right-click without dragging to delete the node
- For the small circles:
- right-click to create a node
- Click
Deleteon the toolbar or3on the keyboard - Left-click a component to delete it
- Click
Edit > Undoon the menu,uon the keyboard, orUndounderHistoryon the right panel to undo - Click
Edit > Redoon the menu,yon the keyboard, orRedounderHistoryon the right panel to undo
- You can do this under
Component Liston the right panel - Click
Move tonext to a component in the list to shift the viewport to the first node of the component
- Under
Projecton the right panel, ClickSave - There is also an autosave every 1 minute
- Under
Projecton the right panel, hide the namespace and then clickX- Namespaces can only be removed when it has no components
- Click
Stencil v(version) > Quiton the menu orescon the keyboard to quit