An educational Ball-Balancing Robot. This project introduces some of the core concepts of robotics: programming, inverse kinematics, computer vision, and PID control.
Discord: https://discord.com/invite/WJuUWsy6DJ
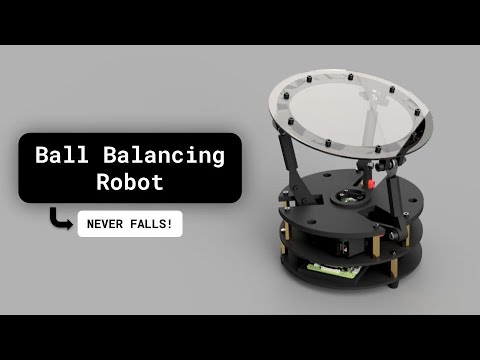


The 3D models and print profile for a Bambu A1 printer can be found here: https://makerworld.com/en/models/1197770-ball-balancing-robot#profileId-1210633
The materials needed are:
| Part Name | Quantity |
|---|---|
| M2 x 8 Cap Head Socket Screw | 6 |
| M2.5 x 10 Cap Head Socket Screw | 4 |
| M3 x 5 Socket Head Screw | 18 |
| M3 x 10 Socket Head Screw | 3 |
| M3 x 15 Socket Head Screw | 1 |
| M3 x 20 Socket Head Screw | 3 |
| M4 x 20 Socket Head Screw | 6 |
| M4 x 30 Socket Head Screw | 6 |
| M5 x 30 Socket Head Screw | 3 |
| M3 Hex Nut | 3 |
| M4 Nylock Nut | 6 |
| M4 Hex Nut | 12 |
| M3 x 10 Standoff | 9 |
| M3 x 15 Standoff | 6 |
| M3 x 20 Standoff | 3 |
| Standoff | 1 |
| 4-10 Bearing | 6 |
| Rubber Foot 12x9x9 | 3 |
| M5 Washer | 6 |
The IMU-driven PID loop now lives in main.py. Launch it with:
python3 main.pyKey environment variables you can tune (and set in the systemd service):
LOOP_HZ,KP,KI,KD,MAX_TILT_DEG– PID gains and outer tilt clamp.AXIS_ROT_DEG,INVERT_PITCH,INVERT_ROLL– align the IMU frame with the servo geometry if you aren’t using calibration vectors.PITCH_OFFSET,ROLL_OFFSET– remove static bias from the IMU readings.CAL_A,CAL_B,CAL_C– provide measured(pitch,roll)readings (comma-separated) for each servo direction; the code solves for the best 2×2 transform to align the axes. Override the targets withCAL_*_TARGET_DEGif your servo layout differs.PITCH_ALPHA,ROLL_ALPHA– per-axis complementary filter weighting; lower values trust the accelerometer more.OUTPUT_EMA_ALPHA– optional smoothing factor (0–1) applied to the PID corrections before converting to servo angles (higher values smooth more).OUTPUT_DEADBAND– treat small PID outputs (|value| below this threshold) as zero to reduce jitter around neutral.DEBUG=1– prints raw vs rotated IMU values, PID corrections, and commanded spherical angles for live tuning.
Each of the three motors must be calibrated. Follow these exact steps:
-
Set all motor offsets to
0.
Incontroller.py, inside theset_motor_anglesfunction under classRobotController, make sure it looks like this:self.s1.angle = clamp(theta1) self.s2.angle = clamp(theta2) self.s3.angle = clamp(theta3)
-
Initialize the robot.
Power on the robot. Then, in your terminal (in correct directory), run:
python controller.py
This sets the initial motor positions. Once the robot has reached its position, do not touch it. Power it off, then use a level or measurement tool to check how flat the top plate is. -
Tune each motor's angle offset.
Based on how the plate is tilted, adjust each motor's angle by adding or subtracting an offset. Modify the code like this:self.s1.angle = clamp(theta1) + OFFSET_S1 self.s2.angle = clamp(theta2) + OFFSET_S2 self.s3.angle = clamp(theta3) + OFFSET_S3
Replace each
OFFSET_Snwith the value needed to make the plate level. These values are specific to your hardware and may differ for each motor. -
Iterate until balanced.
Repeat steps 2 and 3. Re-run the controller, check the plate, and adjust the offsets as needed. Continue this process until the top plate is completely flat and stable.