🎥 Video Walkthrough:
Watch on YouTube
⚠️ Disclaimer:
This is an advanced procedure. I am not responsible for any damage to consoles or modchips. Proceed at your own risk.
| File Name | Description |
|---|---|
OriginalModboFirmware.bin |
Default, unmodified Modbo 5 firmware |
NoLogoOriginalModboFirmware |
Firmware with Matrix logo removed |
fhLogo.bin |
Custom firmware with Foxhound logo at startup |
FOX.bin |
Custom firmware with FOX (MGS3) logo at startup |
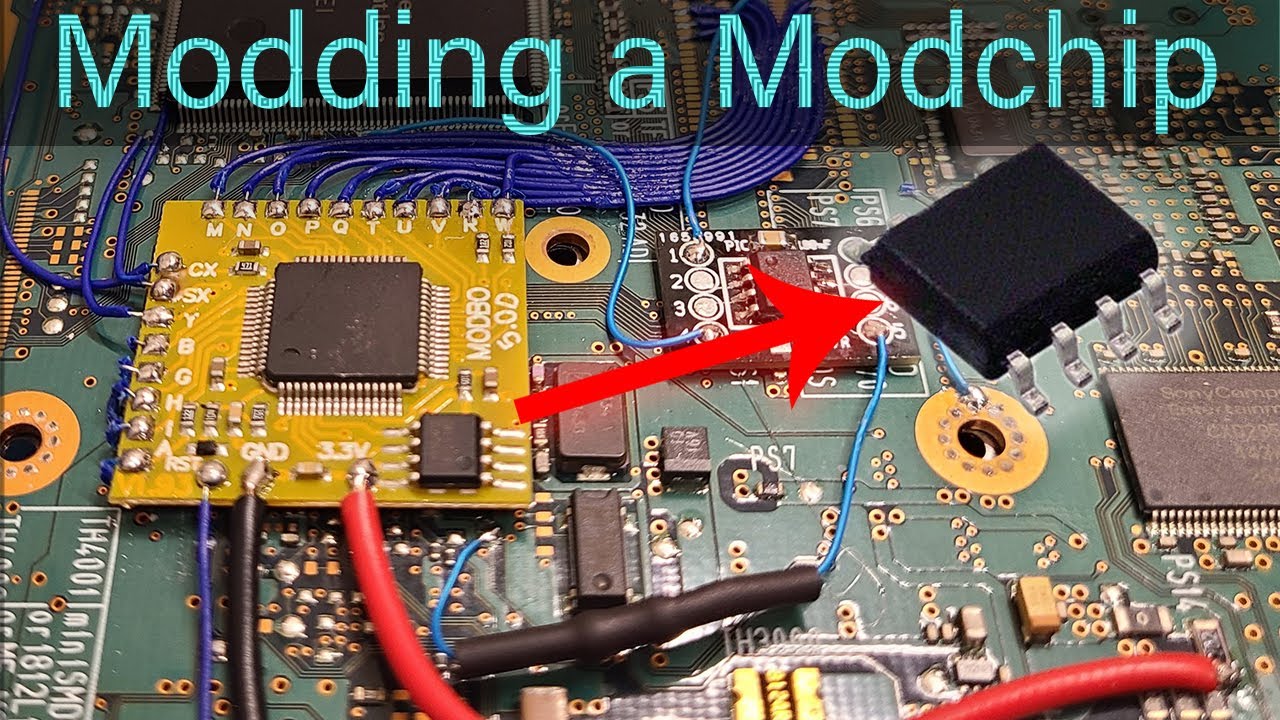
- Flash IC used: Winbond
W25Q40CLSNIG - Matrix PS2 disc boot image offset:
0xE000to0xEFFF
To insert a custom image into the firmware:
- Image format: BMP (monochrome)
- Size: 128×32 pixels
- Color depth: 256 grayscale (
0,0,0to255,255,255) - Transparency: First palette entry must be fully transparent
- Orientation: The BMP must be flipped vertically before insertion
The image is rendered upside down and then displayed correctly on boot.
Get a working firmware dump from another modchip. For Modbo 5.0, you can use the provided OriginalModboFirmware.bin.
Use a supported flash programmer. Example:
- Programmer: Flashcat Xport
- Adapter: SOIC-8 Narrow
- Flash IC: Winbond
W25Q40CLSNIG
- Desolder the old flash IC
- Solder the new chip with correct orientation
- On Modbo 5.0D, Pin 1 should face the PCB edge
- Incorrect orientation can permanently damage the IC
- This method has been successful on two Modbo chips, but results may vary
- A black screen may be caused by other hardware issues
- Do not attempt to increase flash size (e.g., using an 8Mbit chip instead of a 4Mbit one), even if the pinout and commands are compatible