Classmate Connect is a website designed to match classmates based on the number of shared classes between them. If someone knows that someone shares many classes with them, it gives them a potential partner for projects or someone to communicate with outside of class (walking between classes, hoimework help, etc). Classmate Connect assists in this area because it takes away the hassle of finding someone with the same classes. While the classes are added by the administrator, it is up to the students to sign-up. The more students that sign up, the more likely to find someone with shared classes.
The following sections will explain how to setup and download Classmate Connect, as well as how to use it with both admin and standard users. This code is not ready for official release and is only guaranteed to work in testing environments. For ease of use, it is best to run this code with and IDE such as PyCharm.
Follow the steps below to be able to download and run Classmate Connect.
You must have python 3.7 or later installed. Instructions below are for Debian-based Linux distros
sudo apt-get install python3
sudo apt-get install pip3
Install other dependencies in case setup doesn't cover everything
pip3 install django, seleniumHere are the instructions to install ClassmateConnect
Clone the repo from github
git clone https://github.com/bgreenb11/ClassmateConnect.gitDepending on your system, use pip3 or pip to install python3 dependencies This will call setup.py
pip3 install -e .In order to use Classmate Connect, you will need to gather information about courses and users.
- You will need to create a superuser with the following command before continuing
python3 manage.py createsuperuserThe web-scraper for this project is built to scrape the UTK public timetables. In order to use this to gather course info from other institutions, they must use a similar format for their public timetables, and the url to the first page and desired semester must be changed in connect_app/management/commands/populate_db.py as shown below
# Url goes in here
driver.get("https://bannerssb.utk.edu/kbanpr/bwckschd.p_disp_dyn_sched")
select = Select(driver.find_element_by_name("p_term"))
# Semester goes here
select.select_by_visible_text("Fall Sem 2019")
driver.find_element_by_xpath("//input[@type='submit']").click()
- To use the web-scraper, simply run the following command in the terminal*
python3 manage.py populate_db* Depending on the number of subjects and courses, the web-scraper could take up to several minutes to finish
- To access the admin site, simply go to the admin page by typing /admin after the domain name for example
https://127.0.0.1:8000/admin
And you will be directed to the admin login page*

*You must have created a super user or you will not be able to access the admin page without another admin's login
-
After logging in, you will see the admin index, where you can access the Student and Course models. The Group model is provided by Django by default and is not in use at the moment.
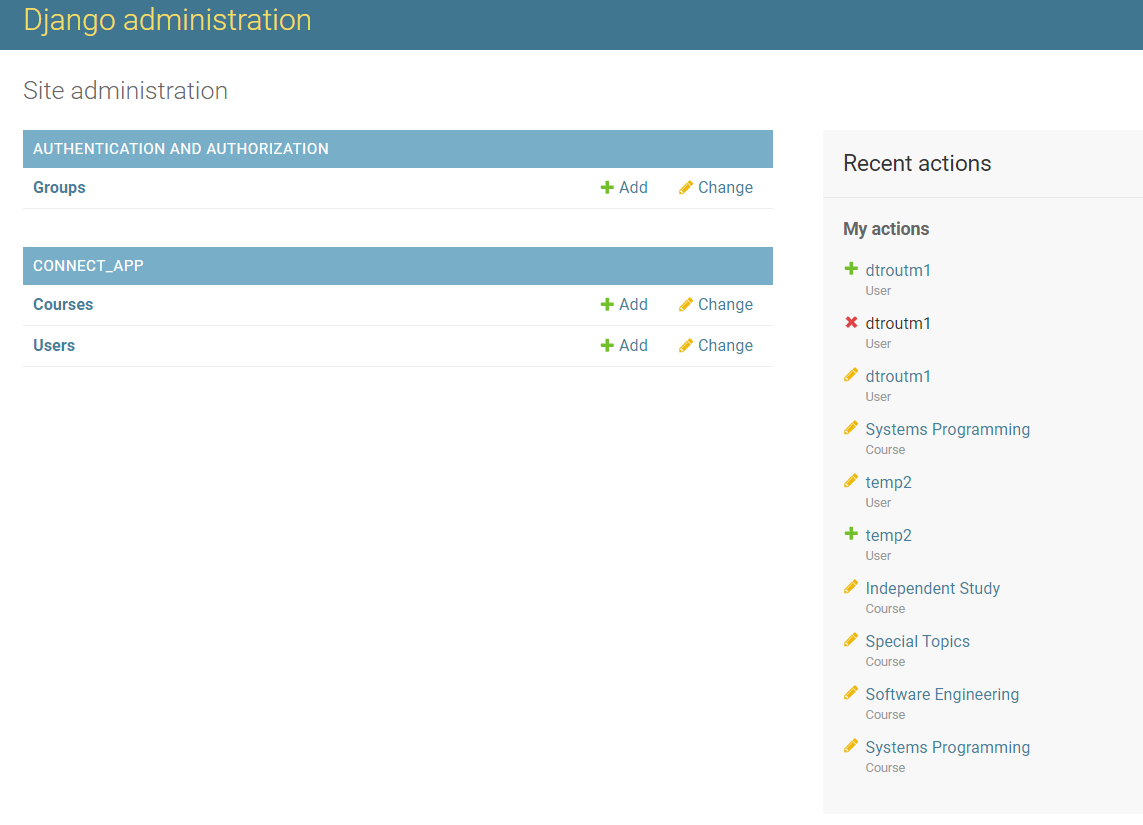 Clicking on connect_app will send you to the connect_app page and its models will be the only thing displayed
 -
Clicking on the Course model will send you to the page with all Course models
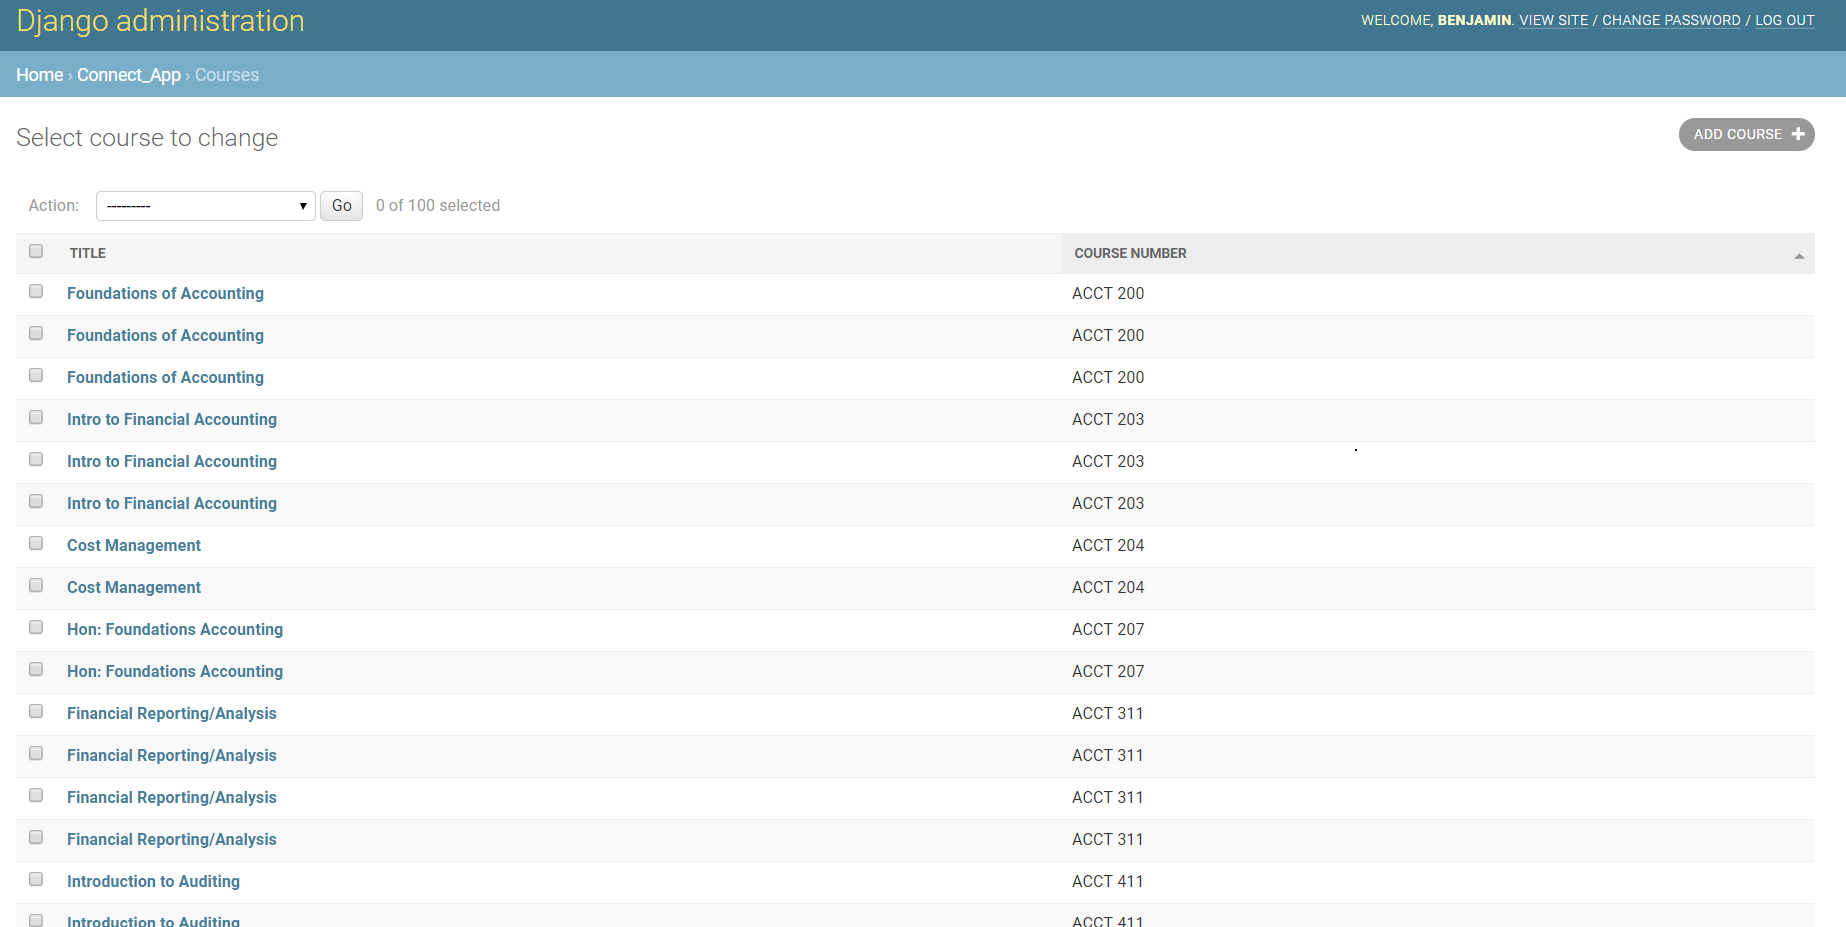 Here you can:
- Select multiple courses, and then go to actions, where currently the only option is to delete the selected course models
- Select the add course option in the upper-right corner
-
If you select the add course option, you'll be redirected here and be able to create a new Course model
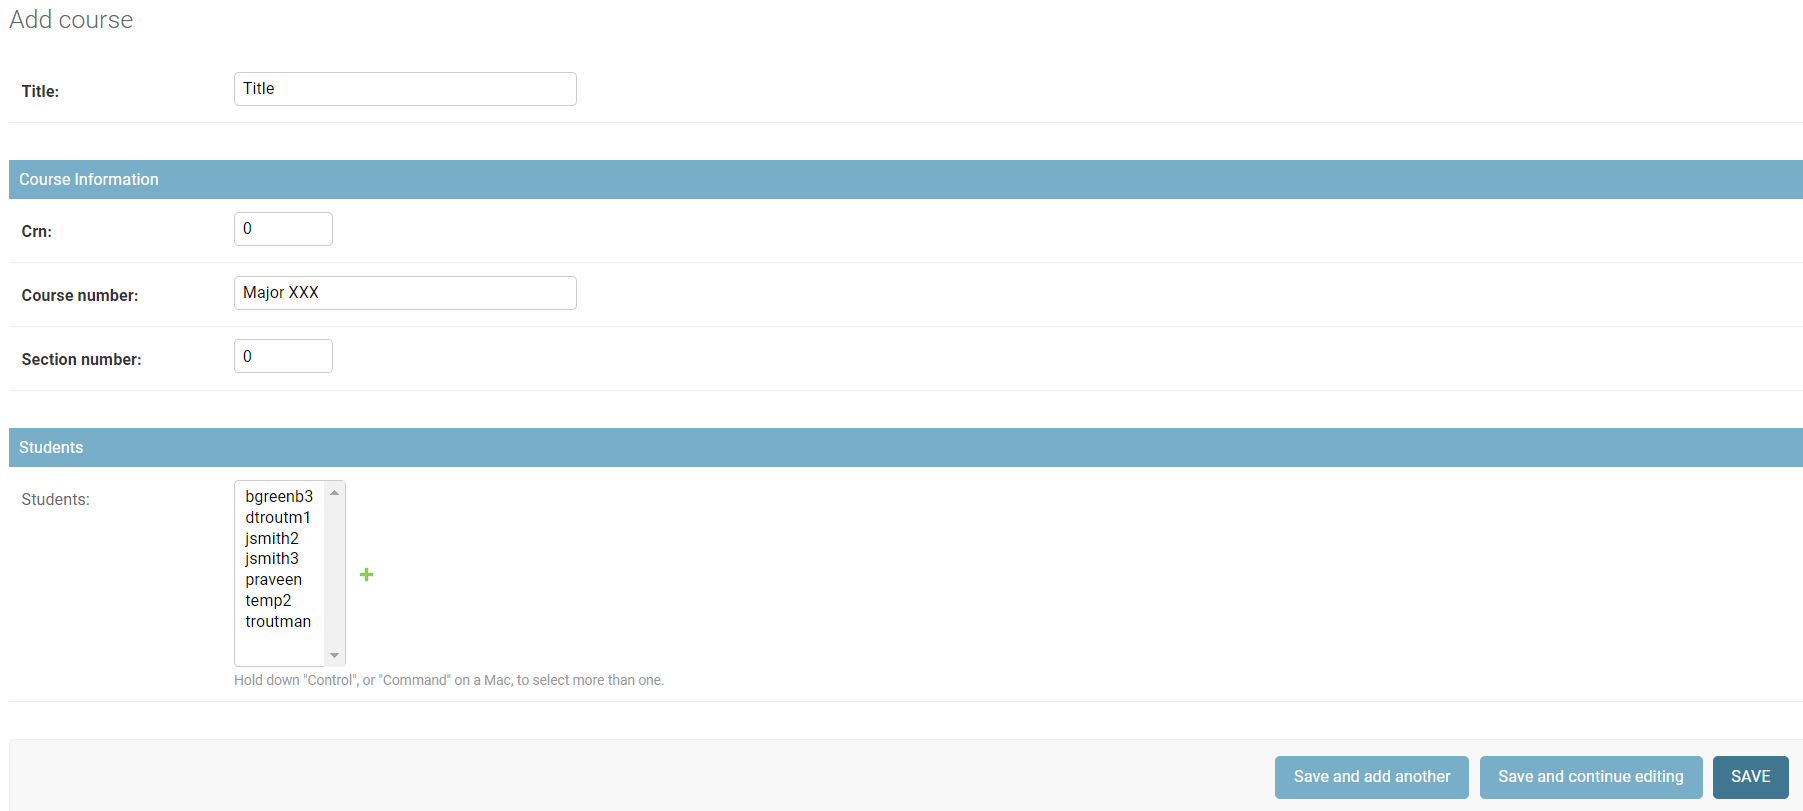 You can specify the Course model's title, crn, course number, and section number, as well as the students
that have already been created to add to the Course model's students field
You can specify the Course model's title, crn, course number, and section number, as well as the students
that have already been created to add to the Course model's students field -
The admin page for the Student models is similar to the Course model's admin page
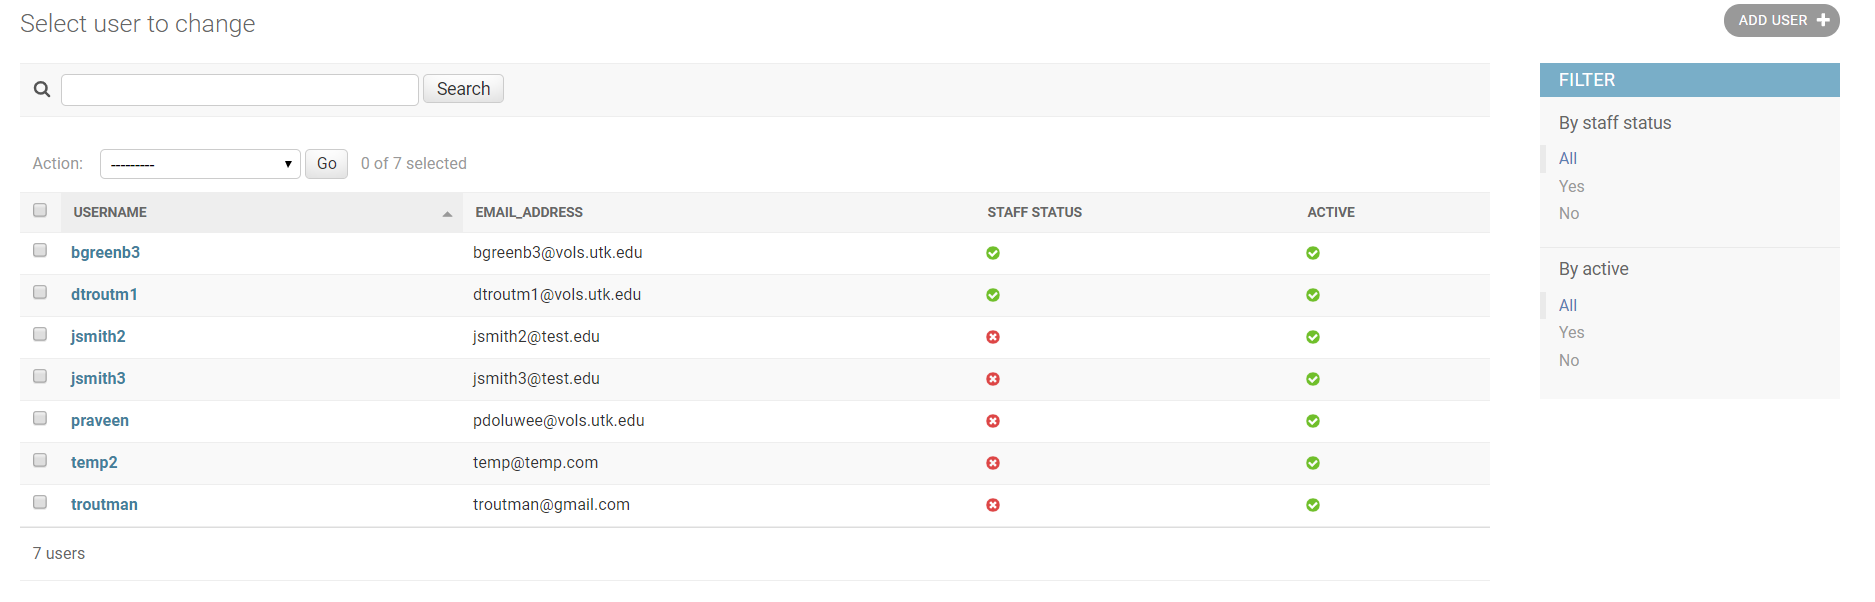 There is a search bar on this page that is currently unavailable on the Course model's admin page
 -
Adding a new Student model is similar to adding a Course model
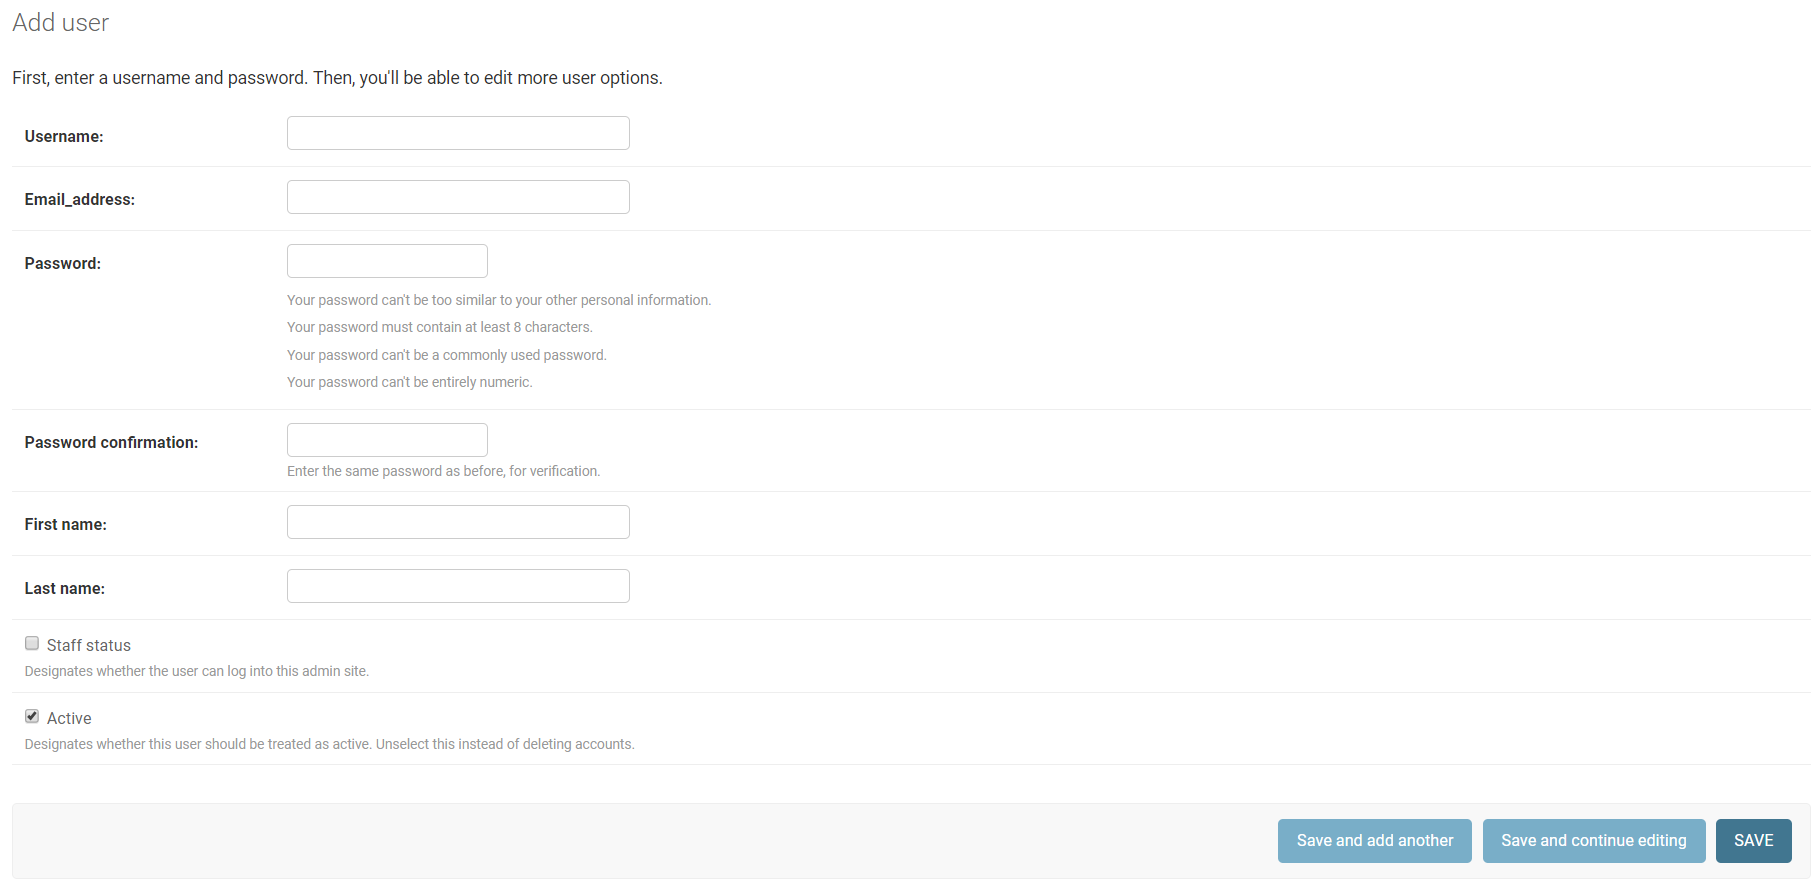 Here you can specify the Student model's username, first name, last name, encrypted password, and whether
they have admin status or not. Do not unselect the active option.
Here you can specify the Student model's username, first name, last name, encrypted password, and whether
they have admin status or not. Do not unselect the active option.
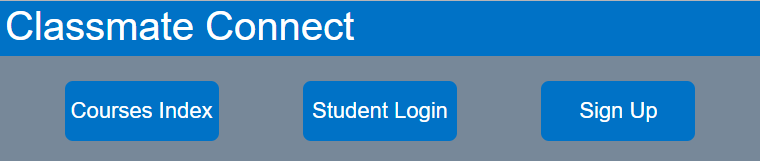
The site is hosted locally, so it is accessed at https://127.0.0.1:8000
Once you go to the landing page for Classmate Connect, there are three options presented:
1. Courses Index - View every course in the database
2. Student Login - Use existing user credentials to search for classmates
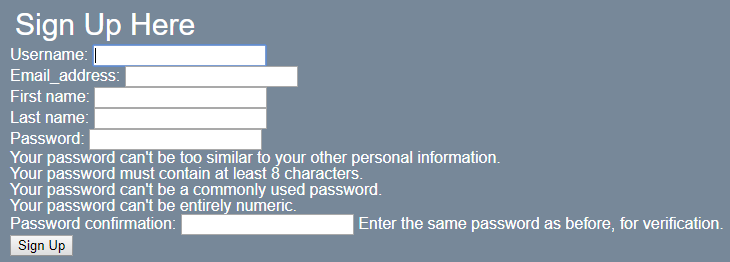
3. Sign Up - Creating a new user
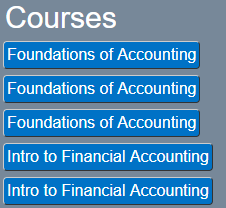
The courses index contains a list of all classes in the database. Each class will direct to a page with more details and a list of all the students taking the course.

The login page is where a user can enter their credentials to access their profile. The profile consists of all relevant user data as well as a list of classmates paired with the number of similar classes to the user. Users can also add courses and remove courses at will to fit their current schedule.
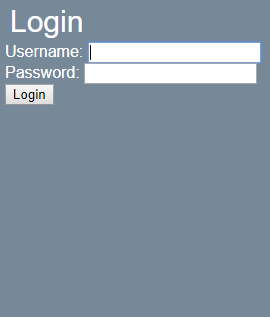
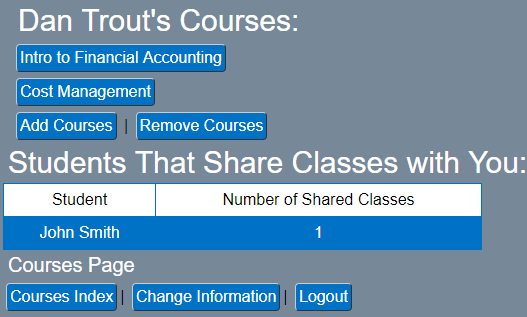
Users can also add courses and remove courses at will to fit their current schedule.
The sign up page allows new users to enter their information and find classmates. Once a user has signed up, they will be redirected to the login page, where they can sign in.
- It is not possible to add/remove classes for a student model on the admin's page
- Django testing environment occasionally throws error when logging in, cause is currently unknown
- No option to change/recover password, will be added later
- Benjamin Greenberg - bgreenb11
- Daniel Troutman - daniel-troutman