You signed in with another tab or window. Reload to refresh your session.You signed out in another tab or window. Reload to refresh your session.You switched accounts on another tab or window. Reload to refresh your session.Dismiss alert
Step by step how to use git with github for beginners
Prerequisites ⚠️
Git
Account on Github
In this short Tutorial I will show you how to use Git Basics for your projects and code versioning, this includes doing:
clones
init's
Commits
Push's
Pull's
Step 1
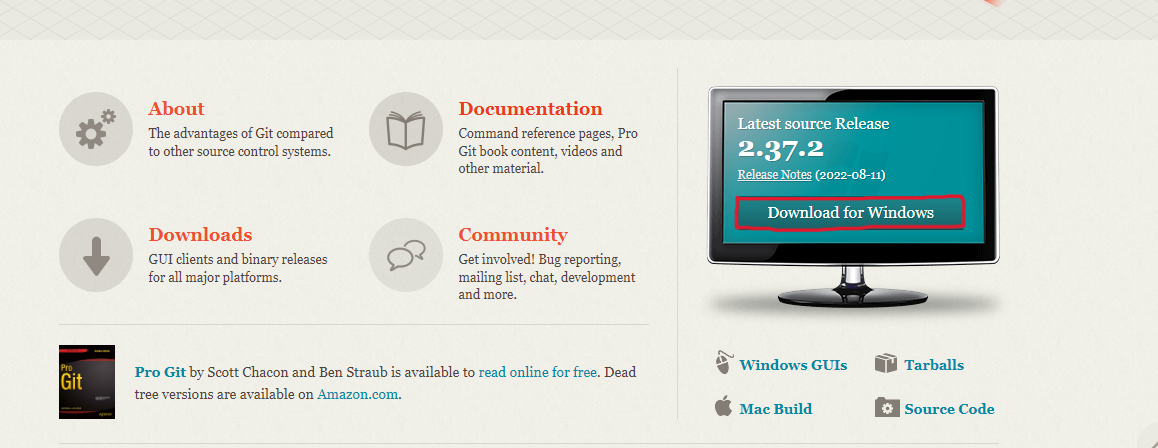
download git
First, you'll need to have Git installed on your machine,
if you don't already, click here -> Download Git , download and install.
Step 2
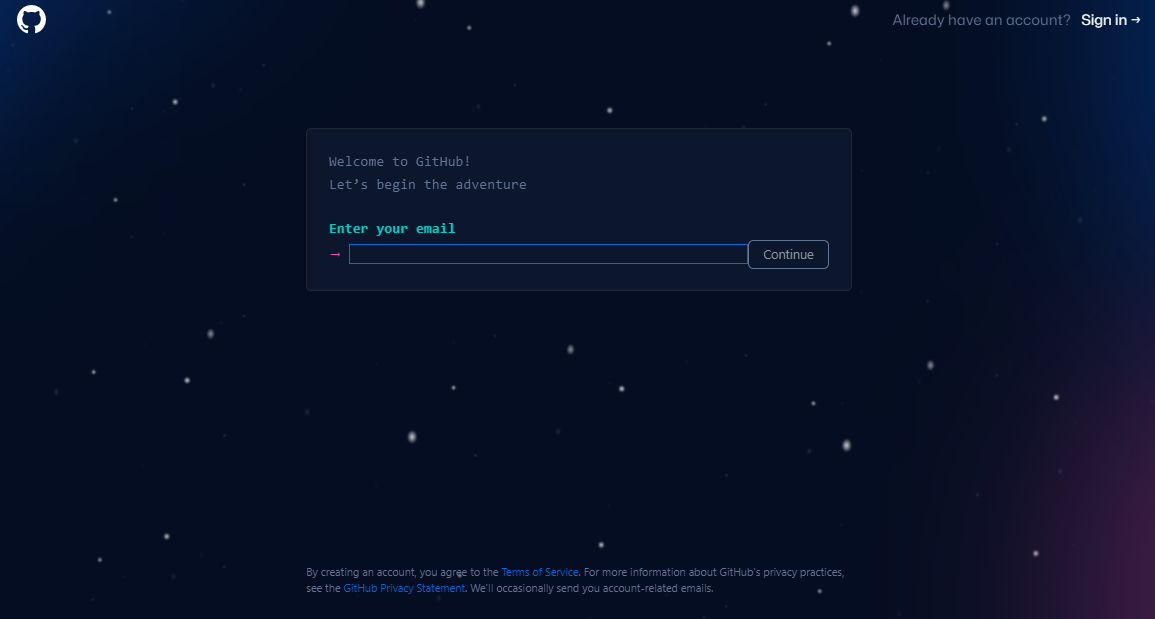
Create or access an account on the GitHub remote repository.
If you don't have access to GitHub, go to the official website or click here -> GitHub to be directed to the Github page, you can login to an account or create your own.
Step #3
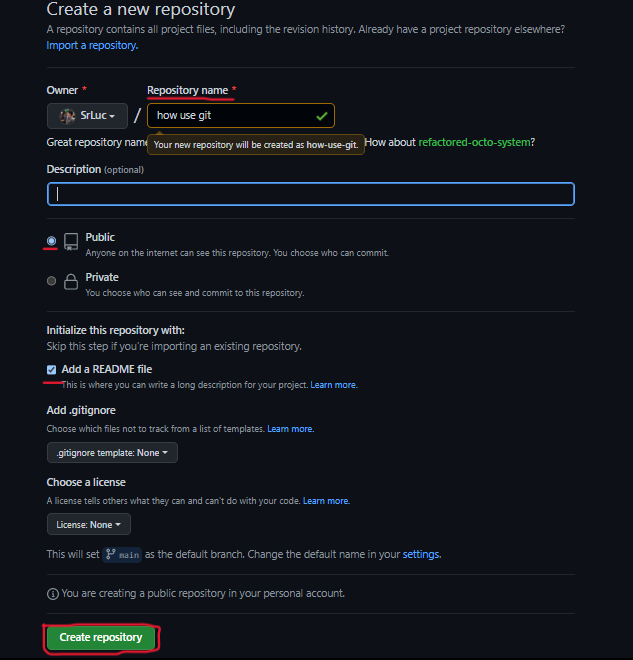
Create a repository on GitHub.
That's right, after creating your Github account, enter it and go to repositories, they are at the top center, next to 'Projects'.
Click on the "New" option to create a new one and you will be directed to the page where you will choose the characteristics of your repository, such as: Name, Description, Visualization options and the like.
Choose a name for your repository, mine will be called gitSteps.
If you like that other people such as college colleagues or even recruiters can see this repository, it is interesting to leave the "Public" option checked, if not, that it is a private project, select the "Private" option.
It is also important to leave the Add a README film option active, since the README file serves as a cover for your repository, it is where the main warnings, methods of use and characteristics of your repository will be.
With all the choices made, create your Remote Repository in Create Repository.
Step #4
Clone the remote repository to your computer.
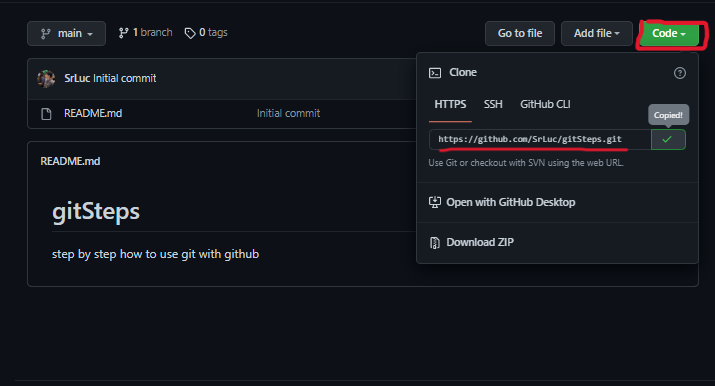
Inside your repository that was created, click on the green box "Code", in this there will be an HTTPS link that serves as a locator of the remote repository, it is with it that we will be able to clone the remote repository to the local computer, save this link , it's very important.
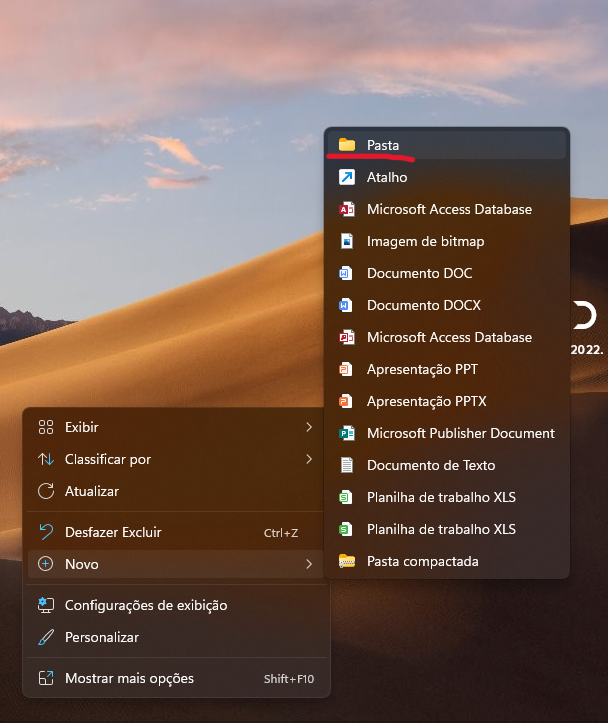
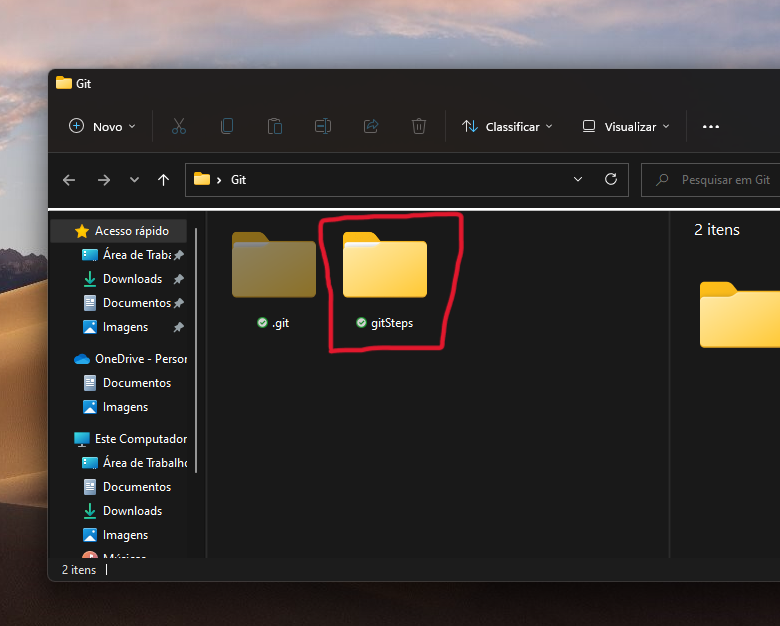
Create a folder on your computer where you will save the files you are going to work on, it can be on the desktop, or anywhere else you want, mine will be on the desktop.
Give the folder a name to better identify it, when I do your projects, I'll call mine "Git".
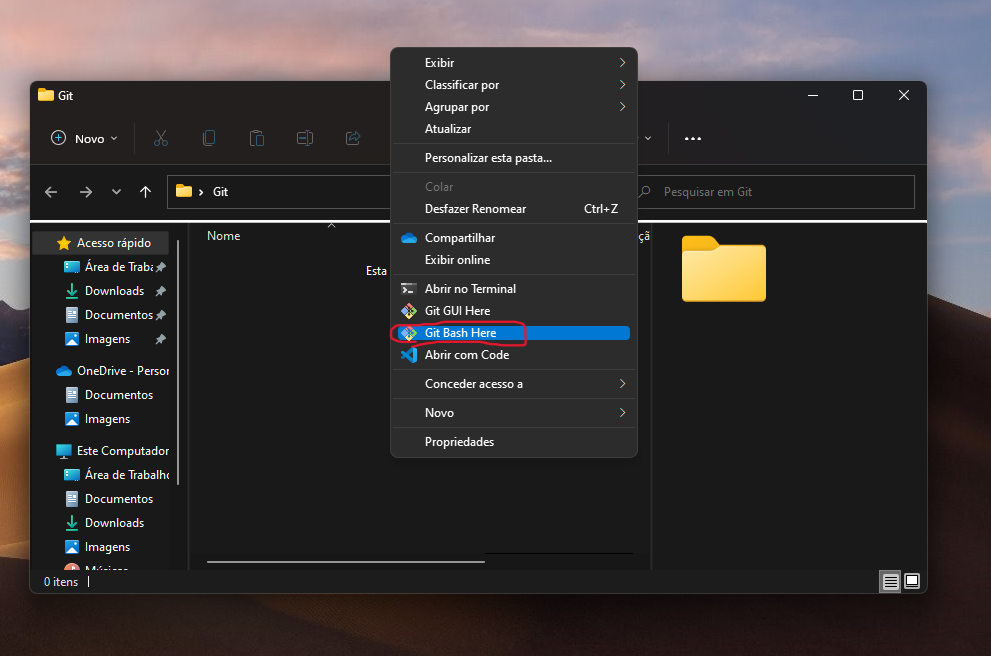
Enter the folder and right-click, if you already have Git installed, select the Open Bash Here option, this option will open the Git terminal (Bash) that responds by command line, and that is what we are going to use to versioning our codes and projects.
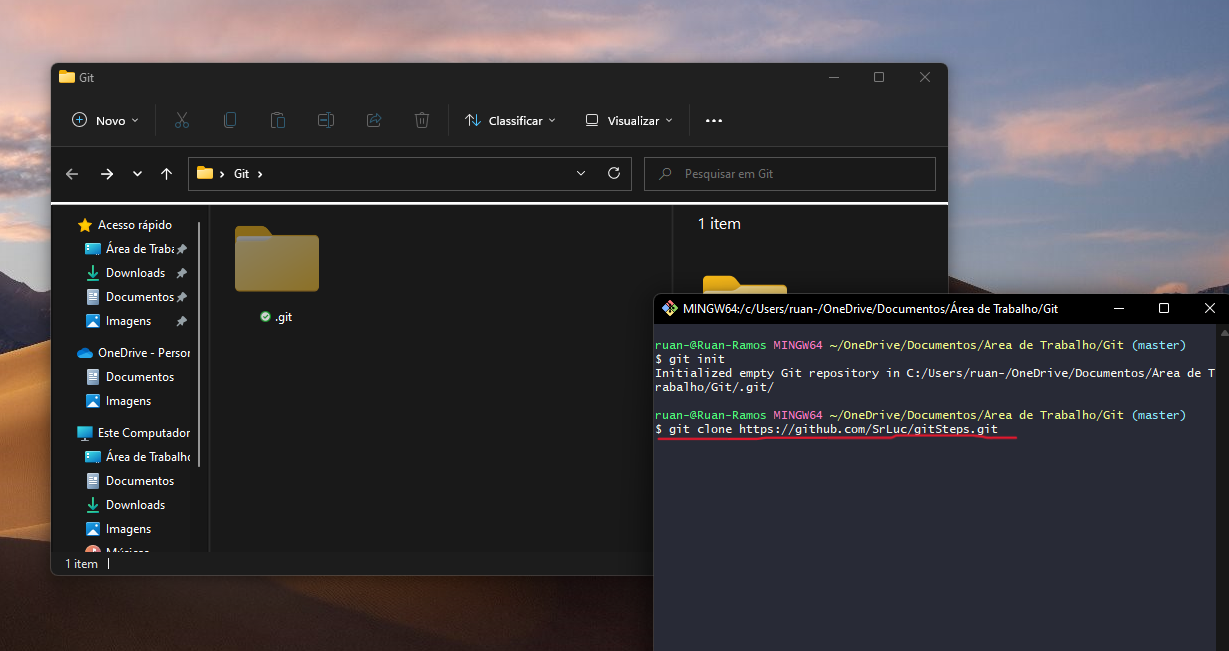
After initializing git, still in Bash (Git Terminal) type the command git clone + repository link
This link I used is the link to my remote repository (the one I told you to keep), that is, that repository you created on GitHub, use it with the command git clone + link
After this command, git will download a clone from the remote repository to the local folder you created, where you will be able to work with your codes and projects.
Step #5
Add Files that will be part of your project.
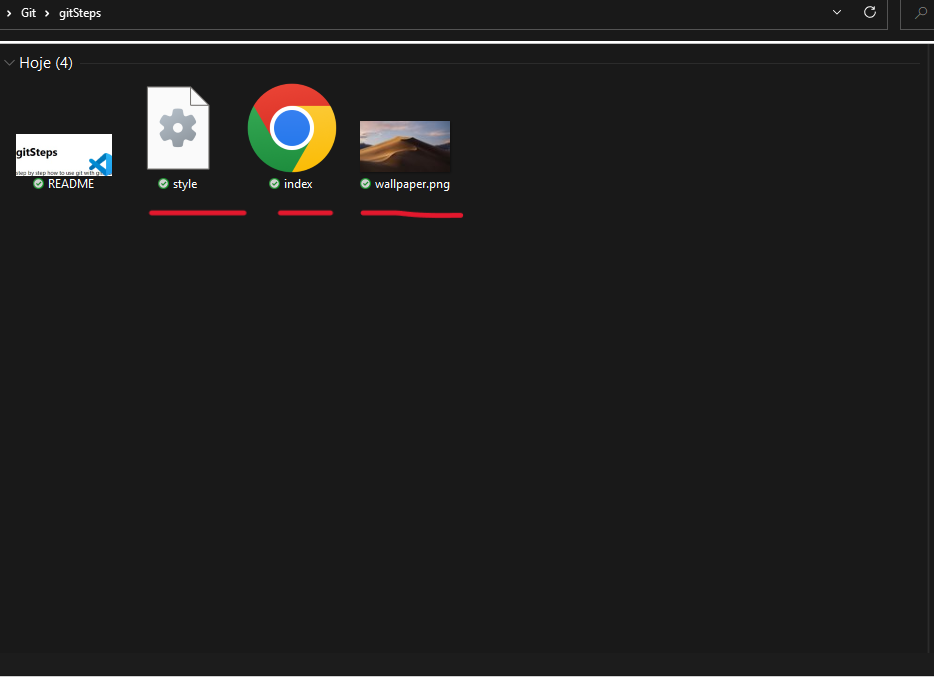
In this part of the walkthrough, with the repository already cloned in your folder where git is running, add the files that will compose your project, for example:
index.html
wallpaper.png
style.css
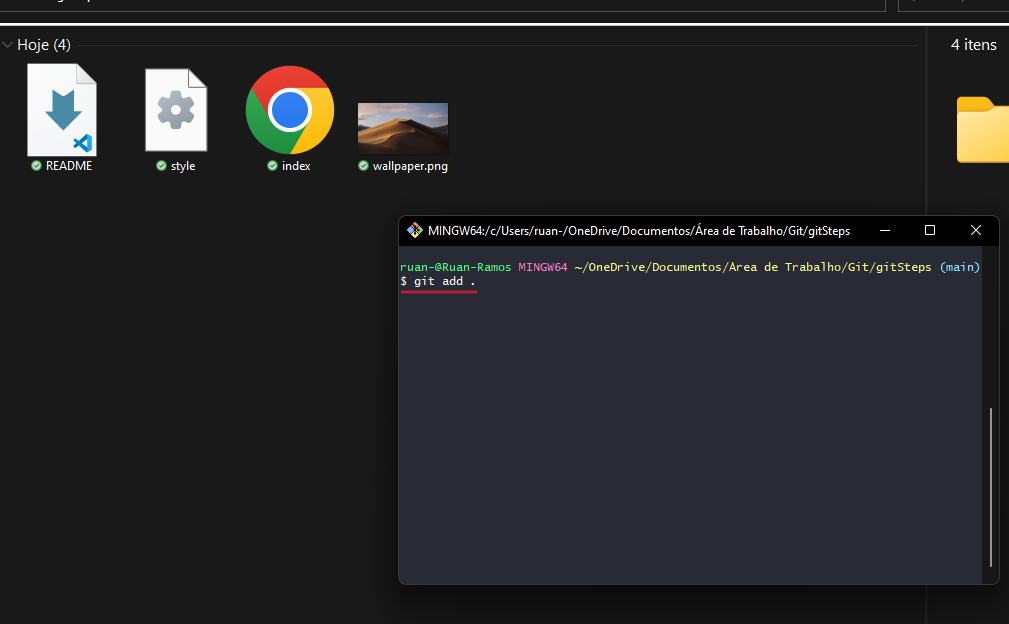
Once your files are inside the page, assuming you created them from vscode inside the page, which is possible and recommended, open the git (Bash) terminal and type the command ( git add . )
This command will put all the files on the page under git version control, this means that the files will be ready to be updated and uploaded to Github.
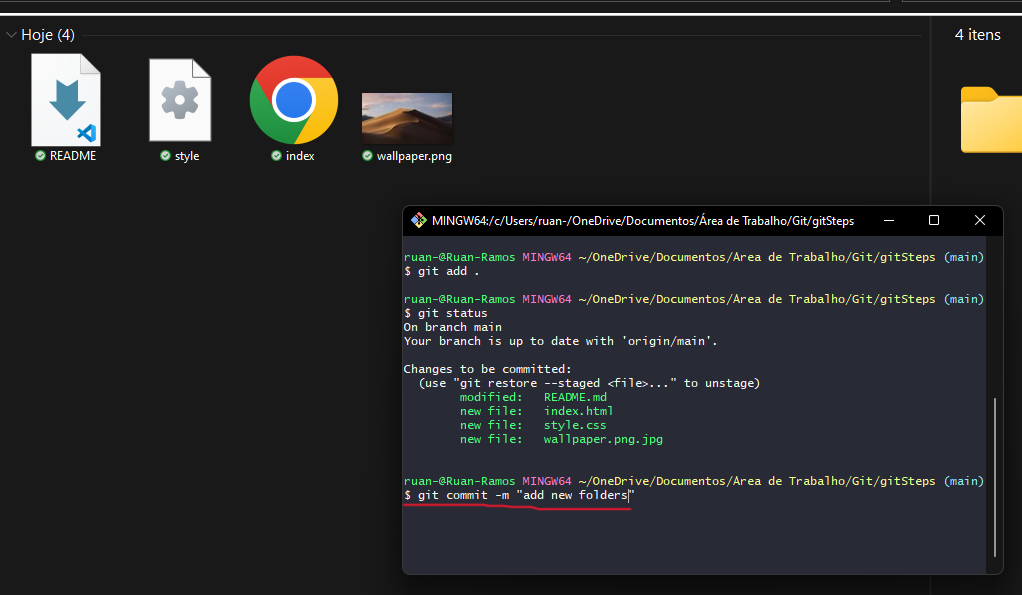
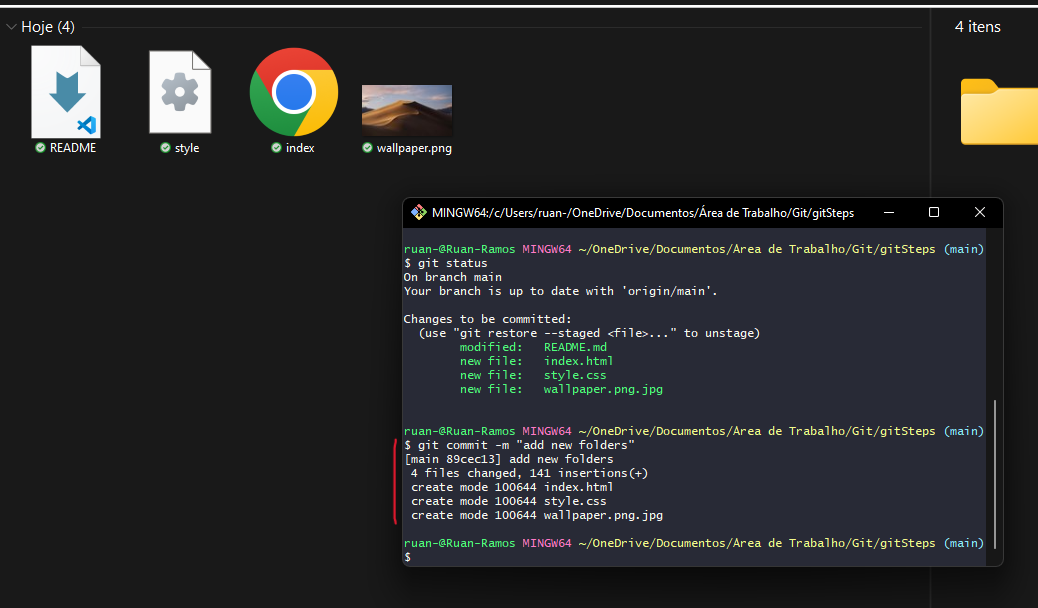
I used the git status command to show the status of new files that are in the local repository folder
Step 6
The commit command.
The commit command will trigger the file or files that are part of the project to its most updated version, with a brief description, that is, the commit command, marks the end of a procedure, which will be the next one to push the files to the remote repository, Github.
the syntax of the commit command is git commit -m "mensage " , that is, the -m expects a message, the quotes (" ") is where it will contain the message, this message is a brief description of your update, for example:
git commit -m "add new features"
git commit -m "add new header"
git commit -m "add new image to site"
after this command the terminal will show some messages on the screen showing which files you committed
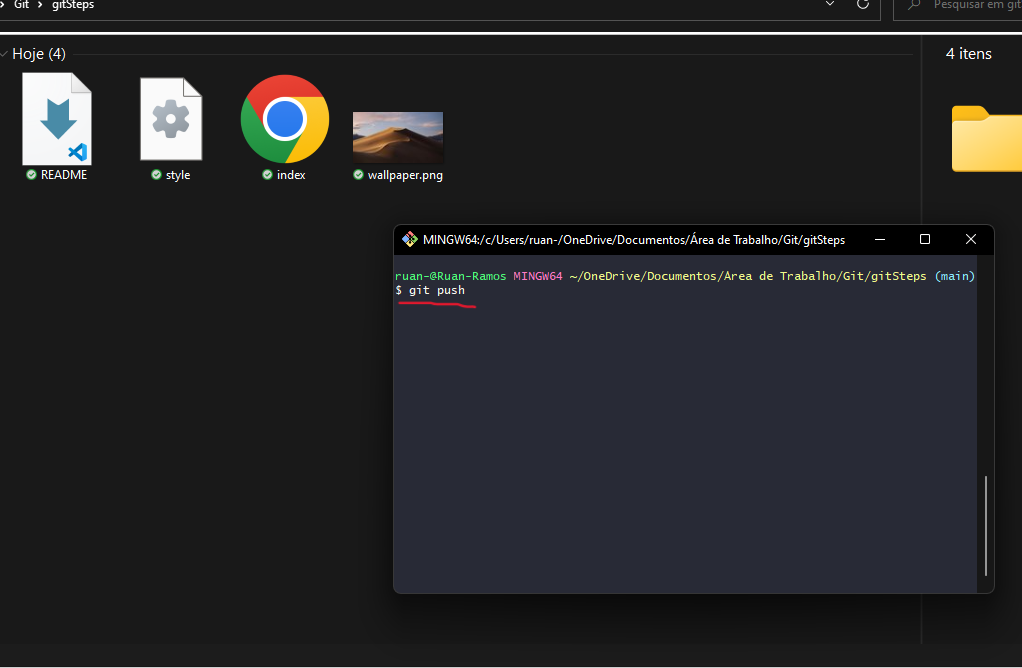
Step 7
The Push command and Github.
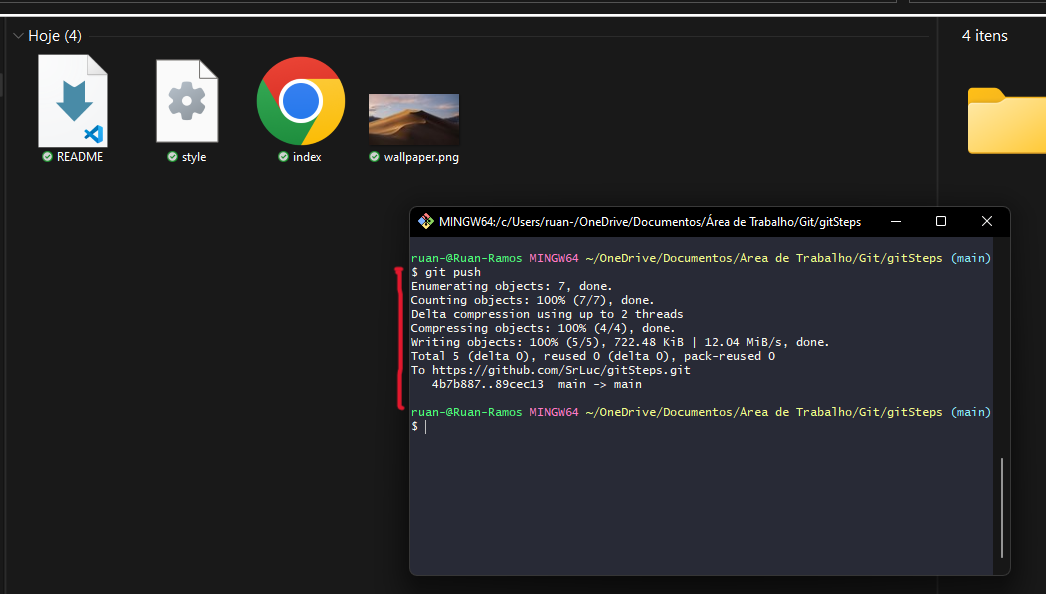
Now, finally, it's time to push your files to Github through the Push command, that is, the git push command serves to allocate all the latest updates of your project files to Github, in this way, with each push , your remote repository keeps abreast of updates from your local repository.
After the push command, the terminal will show some messages on the screen, regarding the push, showing that it was done successfully.
After the push, enter your Github account and you will see in your repositories that the new repository has been updated with the files you added on your computer, so whenever you want to upload a new file or modify an existing one in the folder, just use the git add command. then the command git commit -m "message" and finally the command git push.