- Go to
File>Settings(Windows / Linux) orIntelliJ IDEA>Preferences(Mac) - Install the plugin from the IntelliJ plugin repository
- Search or look for
OneSky - Click
Download & Install - Restart the IDE
- Go to
File>Settings(Windows / Linux) orIntelliJ IDEA > Preferences(Mac) - Find OneSky settings (IntelliJ IDEA 13):
- Under
Project Settings, selectOneSky
- Under
- Find OneSky settings (IntelliJ IDEA 14 or above or Android Studio):
- Under
Other Settings, selectOneSky
- Under
- Enter the your OneSky API key and secret, these can be found on OneSky web admin
- Click
Refreshand select a project from the list - Select the module of your Android application
- Click
ApplyorOK

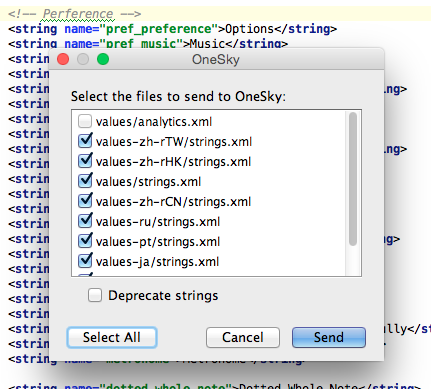
- Select
OneSkyfrom the main menu or context menu (right click any strings.xml) - Click
Send Strings... - Select the string resources to upload from the list
- Optionally select
Deprecate stringsto deprecate the strings that cannot be found in the newly uploaded files with same filenames on server - Click
Send
- Select
OneSkyfrom the main menu - Click
Sync Translatioins... - Select the languages you want to sync with OneSky server
- You can see the progress of each language
- Optionally select
Copy resources for deprecated locales support, the plugin will copy resources to support deprecated locales (e.g. copy Hebrew 'he' to 'iw'). For more information, please visit Android - Locale - Class Overview - Click
Sync
