Spring REST Docs
Spring REST Docs를 사용하기 위해서 Spring REST Docs - Spring io를 기반으로 정리한 문서입니다.
실제 프로젝트에 적용하는 과정 및 결과 예제를 보시려면 5. 예제를 참고해주시면 됩니다.
-
RESTful service를 위한 정확하고 가독성있는 문서를 생성해준다.
-
Spring MVC Test supportorSpring Webflux's WebTestClientorREST-Assured를 사용하여 작성된 Test 코드를 통해 자동 생성된 문서 조각(snippets)들을 결합하여 하나의 문서를 생성한다.-
Snippet
- 재사용 가능한 소스 코드, 기계어, 텍스트의 작은 부분
- Asciidoctor를 사용하여 문서를 생성한다.
-
Asciidoctor
- AsciiDoc 문서를 HTML5, DocBook, PDF와 같은 다양한 형식으로 변환해주는 텍스트 처리기이자 툴체인이다.
-
AsciiDoc
- 문서, 기사, 책, e-북, 슬라읻, 웹 페이지, 메뉴얼 페이지, 블로그 등을 위한 텍스트 포맷
-
Snippet
-
-
Spring REST Docs
- 장점 : Test 기반으로 문서 생성(프로덕션 코드 수정 필요 X), 문서에 대한 신뢰성 높음(Test 통과 시에만 문서 생성)
- 단점 : 적용하기가 쉽지 않다(많은 설정 필요), 엔드 포인트마다 코드 추가(중복 코드 발생)
-
Swagger
- 장점 : 적용하기 쉽다(의존성 하나 추가 및 어노테이션 추가), API 테스트 기능 제공, 기본 UI 제공
- 단점 : 문서에 대한 신뢰성 낮음(정상적으로 작동되지 않아도 작성 가능 및 API수정 시 문서 최신화 필수), 프로덕션 코드 수정(코드 가독성 저하 및 객체지향관점을 벗어남)
-
TDD를 기반으로 프로젝트를 진행할 예정이며 테스트 커버리지를80%를 지키는 것을 목표로 하였기 때문에, 프로젝트 방향성에는Spring REST Docs가 더 적합하다고 판단
plugins {
	id "org.asciidoctor.convert" version "1.5.9.2"  // 1
}

dependencies {
	asciidoctor 'org.springframework.restdocs:spring-restdocs-asciidoctor:{project-version}'  // 2
	testImplementation 'org.springframework.restdocs:spring-restdocs-mockmvc:{project-version}'  // 3
}

ext {
	snippetsDir = file('build/generated-snippets')  // 4
}

test {
	outputs.dir snippetsDir  // 5
}

asciidoctor {
	inputs.dir snippetsDir  // 6
	dependsOn test  // 7
}

bootJar {
	dependsOn asciidoctor  // 8
	from ("${asciidoctor.outputDir}/html5") {
		into 'static/docs'  // 9
	}
}-
Asciidoctor 플러그인 적용
-
아래와 같이 나올 경우, asciidoctor 버전을 업그레이드 해주면 된다. 해당 링크 참조

-
-
asciidoctor 설정에 있는
spring-restdocs-asciidoctor에 의존성을 주입해준다..adoc파일에서 사용할 문서 조각 속성들이build/generated-snippets을 가리키게 설정된다.- Spring boot 사용 시
{project-version}을 제거해야한다
- Spring boot 사용 시
-
testImplementation 설정에 있는
spring-restdocs-mockmvc에 의존성을 주입해준다.-
WebTestClientorREST Assured를 사용한다면,spring-restdocs-webtestclientorspring-restdocs-restassured를 사용하면 된다.
-
-
생성된 문서 조각들에 대한 출력 위치를
snippetsDir로 설정한다. -
test작업 출력 디렉토리를snippetsDir로 설정한다. -
asciidoctor의 입력 디렉토리를
snippetsDir로 설정한다. -
문서가 생성되기 전 모든 테스트가 실행될 수 있게 하기 위해서 asciidoctor의 작업을
test작업에 의존하게 설정한다.- 즉, test 작업 수행 → asciidoctor 작업 수행
-
jar이 생성되기전에 문서가 생성되는 것을 보장하게 한다.- 즉, asciidoctor 작업 수행 → jar 생성
-
ascidoctor 작업의 결과로 생성된 문서(html5)를 jar의
static/docs디렉토리로 복사한다.
- JUnit 5 Configuration
- JUnit 5에서 문서 조각들을 생성하기 위해,
RestDocumentationExtension.class를 추가해줘야 한다.
@ExtendWith({RestDocumentationExtension.class, SpringExtension.class})
@SpringBootTest
public class ApiDocumentationJUnit5IntegrationTest { //... }-
RestDocumentationExtension.class는 자동으로 출력 디렉토리/build/generate-snippets에 설정되어 있다.- 의존성 주입 3에서
{project-version}으로 주입되어,RestDocumentationExtension.class을 불러오지 못할 경우,2.0.4.RELEASE같은 특정 버전으로 명시해줌으로써 해당 문제를 해결할 수 있다.
- 의존성 주입 3에서
- 일반적으로 Spring 테스트를 할 때
SpringExtension.class도 추가해줘야 한다. -
JUnit 5.1을 사용하는 경우 클래스 필드로 등록함으로써 출력 디렉토리를 임의로 오버라이드 할 수 있다.
@RegisterExtension
final RestDocumentationExtension restDocumentation = new RestDocumentationExtension ("custom");-
@BeforeEach에MockMvc인스턴스 설정
private MockMvc mockMvc;

@BeforeEach
public void setUp(WebApplicationContext webApplicationContext,
  RestDocumentationContextProvider restDocumentation) {
    this.mockMvc = MockMvcBuilders.webAppContextSetup(webApplicationContext)
      .apply(documentationConfiguration(restDocumentation))
	//  .alwaysDo(document("{method-name}", preprocessRequest(prettyPrint()), preprocessResponse(prettyPrint())))
			.build();
}-
MockMvcRestDocumentationConfigurer를 사용함으로써MockMvc인스턴스가 설정이 된다.-
org.springframework.restdocs.mockmvc.MockMvcRestDocumentation에 있는documentationConfiguration()로 부터 해당 클래스의MockMvcRestDocumentationConfigurer인스턴스를 얻을 수 있다. -
MockMvcRestDocumentationConfigurer은 사용자 커스텀 설정을 위한 API도 제공한다.
-
-
MockMvc호출 시마다, 추가적인 설정없이 자동적으로 문서가 생성되게 하기 위해서alwaysDo()메소드를 사용할 수 있다.- 디폴트 문서 조각들이 테스트 함수 이름의 폴더에 생성이 된다.
-
prettyPrint()전처리기는 더 가독성 있게 문서 조각들을 보여준다.
- Junit을 사용하지 않는 테스트를 설정하는 경우에는 해당 링크 참조
this.mockMvc.perform(get("/").accept(MediaType.APPLICATION_JSON))  // 1
	.andExpect(status().isOk())  // 2
.andDo(document("index")); // 3 - 서비스의
"/"를 호출하고,application/json타입으로 응답 받는다. - 응답을 검증한다.
- 설정되어 있는 출력 디렉토리 내부
index라는 이름을 가진 디렉토리에 문서 조각들이 작성이 되면서 서비스 호출이 문서화 된다.- 문서 조각들은
RestDocumentationResultHandler에 의해 작성된다. -
org.springframework.restdocs.mockmvc.MockMvcRestDocumentation에 있는document()메소드로부터 해당 클래스의RestDocumentationResultHandler인스턴스를 얻을 수 있다.
- 문서 조각들은
- 기본적으로 6개의 문서 조각이 작성된다.
<output-directory>/index/curl-request.adoc<output-directory>/index/http-request.adoc<output-directory>/index/http-response.adoc<output-directory>/index/httpie-request.adoc<output-directory>/index/request-body.adoc<output-directory>/index/response-body.adoc- 그 외 생성되는 문서 조각들은 해당 링크 참조
-
생성된 문서 조각을 사용하기 전에,
.adoc소스 파일을 만들어야 한다.- 접두사로
.adoc가 포함되면 어떤 이름으로 만들어도 상관없다. - 결과물인
HTML파일은 같은 이름을 가지지만 접두사.html를 가진다.
- 접두사로
-
문서 조각 출력 디렉토리를 참조하기 위해 Gradle build 설정에서 설정한
spring-restdocs-asciidoctor에 의해 자동적으로 저장된 문서 조각들을 아래와 같이 사용할 수 있다.
include::{snippets}/index/curl-request.adoc[]- Rest Docs는 HATEOAS에 있는 링크들을 문서화하는 것을 지원한다.
this.mockMvc.perform(get("/").accept(MediaType.APPLICATION_JSON))
	.andExpect(status().isOk())
	.andDo(document("index", links(  // 1
			linkWithRel("alpha").description("Link to the alpha resource"),  // 2
linkWithRel("bravo").description("Link to the bravo resource")))); // 3- 응답의 링크들을 기술하는 문서 조각을 생성하기 위해서 Rest docs를 설정한다.
org.springframework.restdocs.hypermedia.HypermediaDocumentation의link메소드 사용 -
alpha라는 릴레이션을 가지는 링크를 기술한다. -
bravo라는 릴레이션을 가지는 링크를 기술한다.
→ 리소스들의 링크를 기술하고 있는 테이블을 포함하는 links.adoc 라는 이름인 문서 조각이 나온다.
- 응답 내에 문서화되지 않은 링크가 발견되면 테스트는 실패한다. 이와 비슷하게, 응답 내에서 문서화되어 있는 링크가 발견되지 않고 링크가 옵션으로 표시가 되지 않을 경우에도, 테스트가 실패한다.
- 링크를 문서화하기를 원하지 않을 경우, ignore로 표시해야 한다.
- 또는,
org.springframework.restdocs.hypermedia.HypermediaDocumentation의relaxedLinks메소드를 사용하여 문서화되지 않은 링크들이 테스트 실패를 야기하지 않게 할 수 있다.
- 2가지 링크 형식
- Atom
- 링크들이
links라는 이름의 배열내에 존재한다. - 응답 내용 타입이
application/json일 때 디폴트로 사용된다.
- 링크들이
- HAL
- 링크들이
_links라는 이름의 map에 존재한다. - 응답 내용 타입이
application/hal+json일 때 디폴트로 사용된다.
- 링크들이
- Atom
- 다른 내용 타입을
AtomorHAL형식 링크로 사용한다면,links에LinkExtractor구현체를 제공하면 된다.
.andDo(document("index", links(halLinks(),
		linkWithRel("alpha").description("Link to the alpha resource"),
linkWithRel("bravo").description("Link to the bravo resource"))));-
org.springframework.restdocs.hypermedia.HypermediaDocumentation의halLinks()는 링크들을 HAL 형식으로 나타내게 하는 메소드이다. - API의 링크를
AtomorHAL이 아닌 다른 형식으로 나타내게 하고 싶다면, 응답으로부터 링크들을 추출하는LinkExtractor인터페이스의 자신 고유 구현체를 구현하여 제공하면 된다.
-
HAL을 사용할 때, 모든 응답의 공통적인curies,self와 같은 링크들을 매번 문서화하기 보다는, 전체에서 한번만 해당 공통 링크를 문서화하고 나머지는 무시하기를 원할 수도 있다. 그럴 경우, 특정 링크를 무시하도록 설정된 문서 조각에LinkDescriptor를 추가하여, 문서 조각들을 재사용할 수 있게 할 수 있다. 참고 링크
public static LinksSnippet links(LinkDescriptor... descriptors) {
	return HypermediaDocumentation.links(
			linkWithRel("self").ignored().optional(),
			linkWithRel("curies").ignored())
			.and(descriptors);
}- Rest Docs는 자동으로 요청과 응답의 본문을 위한 문서 조각들을 생성한다.
-
request-body.adoc,response-body.adoc
- 더 자세한 요청 또는 응답 본문의 문서를 제공하기 위해서, 본문의 필드를 문서화하는 지원이 제공되야만 한다.
{
	"contact": {
		"name": "Jane Doe",
		"email": "jane.doe@example.com"
	}
}- 위의 본문의 필드들을 문서화 할 경우
this.mockMvc.perform(get("/user/5").accept(MediaType.APPLICATION_JSON))
		.andExpect(status().isOk())
		.andDo(document("index",
				responseFields(  // 1
						fieldWithPath("contact.email").description("The user's email address"),  // 2
fieldWithPath("contact.name").description("The user's name")))); // 3- 응답 본문에 있는 필드들을 기술하는 문서 조각을 생성하기 위해 REST docs를 설정한다. 요청을 문서화 한다면
org.springframework.restdocs.payload.PayloadDocumentation의requestFields를 사용할 수 있다. -
contact.email경로의 필드를 예측한다. -
contact.name경로의 필드를 예측한다.
-
필드들을 기술하는 테이블을 포함하는 문서 조각이 결과물로 나온다.
request-fields.adocorresponse-fields.adoc- 본문 내에 문서화되지 않은 필드가 발견되면 테스트는 실패한다. 이와 비슷하게, 본문 내에서 문서화되어 있는 필드가 발견되지 않고 필드가 옵션으로 표시가 되지 않을 경우에도, 테스트가 실패한다.
- 모든 필드에 대한 문서를 제공하지 않기를 원할 경우, 본문의 영역 일부만 문서화될 수 있게 할 수 있다.
 this.mockMvc.perform(get("/user/5").accept(MediaType.APPLICATION_JSON))
		.andExpect(status().isOk())
		.andDo(document("index",
				responseFields(
						subsectionWithPath("contact").description("The user's contact details"))));  //  1
-
contact경로 부분만 문서화를 한다.contact.emailandcontact.name만 문서화 된다.
-
subsectionWithPath는 본문의 일부 영역에 대한 높은 수준의 개요를 제공하는데 유용할 수 있다. 더 자세한 내용 참고 링크 - 필드나 일부 영역을 문서화 시키고 싶지 않을 경우에는, ignore로 표시하면 된다. 이를 통해 위의 test failure가 발생시키지 않게 할 수 있다.
- 또는,
org.springframework.restdocs.payload.PayloadDocumentation의relaxedResponseFields,relaxedRequestFields메소드를 사용하여 문서화되지 않은 필드들이 테스트 실패를 야기하지 않게 할 수 있다.
-
REST docs는 디폴트로 본문을
JSON형식으로 간주하고 있다.XML본문을 문서화하기 위해서는 내용 타입을application/xml와 호환되게 설정해야한다. -
JSON 필드 경로
- JSON 필드 경로는
.또는[ ]표기를 사용한다.- ex)
a.b,['a'], ['b'] - 두 표기 모두에서 배열을 나타내기 위해서는
[]를 사용한다. -
[ ]표기에서 키 이름내에.을 사용할수도 있다.- ex)
['a.b']
- ex)
- 다른 표기법이 한 경로에서 모두 사용될 수도 있다.
- ex)
a['b']
- ex)
- ex)
{ "a":{ "b":[ { "c":"one" }, { "c":"two" }, { "d":"three" } ], "e.dot" : "four" } }-
a.b[]와 같은 경로에서
[]는 전체 배열을 나타낸다. -
배열에서 필드를 인식하기 위해서
.또는[ ]표기를 사용할 수 있다.[ { "id":1 }, { "id":2 } ]- ex)
[].id: 모든 객체에서의id필드를 나타낸다.
- ex)
-
*는 다른 이름을 가진 필드들을 매치하기 위해 사용할 수 있다.{ "users":{ "ab12cd34":{ "role": "Administrator" }, "12ab34cd":{ "role": "Guest" } } }- ex)
user.*.role: 모든 user의 role을 나타낸다.
- ex)
- JSON 필드 경로는
-
JSON 필드 타입
-
array,boolean,object,number,null,string,varies -
FieldDescriptor의type(Object)메소드를 사용함으로써 타입을 설정해줄수도 있다.
.andDo(document("index",
		responseFields(
				fieldWithPath("contact.email").type(JsonFieldType.STRING)
						.description("The user's email address"))))
-
- 본문이 크거나 구조적으로 복잡하면, 본문의 각 영역을 문서화 하는 것이 유용할수도 있다.
{
	"weather": {
		"wind": {
			"speed": 15.3,
			"direction": 287.0
		},
		"temperature": {
			"high": 21.2,
			"low": 14.8
		}
	}
}-
temperature객체를 문서화하는 문서 조각을 생산할 경우
 this.mockMvc.perform(get("/locations/1").accept(MediaType.APPLICATION_JSON))
		.andExpect(status().isOk()).andDo(document("location",
responseBody(beneathPath("weather.temperature"))));-
org.springframework.restdocs.payload.PayloadDocumentation에 있는beneathPath,responseBody를 사용하여 응답 본문의 일부 영역을 포함하는 문서 조각을 생산한다. 요청 본문을 위한 문서 조각을 생산하기 위해서는requestBody를 사용하면 된다. - 결과물
 {
	"temperature": {
		"high": 21.2,
		"low": 14.8
	}
}-
문서 조각의 이름을 구분짓기 위해서, 해당 영역에 대한 식별자가 포함되며, 디폴트로
beneath-${path}와 같은 형식이다.- 위의 문서 조각 이름은
response-body-beneath-weather.temperature.adoc이 된다. - 커스터마이징 식별자를 사용하고 싶을 경우에는
withSubsectionId(String)을 사용하면 된다.
responseBody(beneathPath("weather.temperature").withSubsectionId("temp"));
-
request-body-temp.adoc라는 이름의 문서 조각이 생성된다.
- 위의 문서 조각 이름은
this.mockMvc.perform(get("/locations/1").accept(MediaType.APPLICATION_JSON))
		.andExpect(status().isOk())
		.andDo(document("location",
				responseFields(beneathPath("weather.temperature"),
						fieldWithPath("high").description(
								"The forecast high in degrees celcius"),
				fieldWithPath("low")
.description("The forecast low in degrees celcius"))));-
beneathPath메소드를 사용하여weather.temperature경로 아래의 응답 본문의 영역에 있는 필드들을 기술하는 문서 조각을 생산한다.-
weather.temperature의 필드high,low를 기술하는 테이블을 포함하는 문서 조각 - 문서 조각의 이름을 구분짓기 위해서, 해당 영역에 대한 식별자가 포함되며, 디폴트로
beneath-${path}와 같은 형식이다.- 위의 문서 조각 이름은
response-fields-beneath-weather.temperature.adoc이 된다.
- 위의 문서 조각 이름은
-
-
requestParameters를 사용함으로써 요청 파라미터를 문서화할 수 있다.-
GET요청 쿼리 문자열에 있는 파라미터들을 포함시킬 수 있다.
this.mockMvc.perform(get("/users?page=2&per_page=100"))  //  1
	.andExpect(status().isOk())
	.andDo(document("users", requestParameters(  // 2
			parameterWithName("page").description("The page to retrieve"),  // 3
			parameterWithName("per_page").description("Entries per page")  // 4
	)));
- 쿼리 문자열 내
page,per_page두 파라미터가 있는GET요청을 수행한다. -
org.springframework.restdocs.request.RequestDocumentation에 있는requestParameters메서드를 사용하여 요청 파라미터를 기술하는 문서 조각을 생산하도록 REST docs를 설정한다. -
org.springframework.restdocs.request.RequestDocumentation에 있는parameterWithName메서드를 사용하여page파라미터를 문서화한다. -
per_page파라미터를 문서화한다.
-
POST요청의 본문에 있는 데이터 형식으로 요청 파라미터를 포함시킬수도 있다.
this.mockMvc.perform(post("/users").param("username", "Tester"))
	.andExpect(status().isCreated())
	.andDo(document("create-user", requestParameters(
			parameterWithName("username").description("The user's username")
	)));
-
username하나의 파라미터를 가지는POST요청을 수행한다. -
GET,POST의 모든 경우에서 생성되는 문서 조각의 이름은request-parameters.adoc이며, 파라미터를 기술하는 테이블을 포함하고 있다. -
본문 내에 문서화되지 않은 요청 파라미터가 발견되면 테스트는 실패한다. 이와 비슷하게, 본문 내에서 문서화되어 있는 요청 파라미터가 발견되지 않고 요청 파라미터가 옵션으로 표시가 되지 않을 경우에도, 테스트가 실패한다.
- 요청 파라미터를 문서화하기를 원하지 않을 경우, ignore로 표시해야 한다.
- 또는,
org.springframework.restdocs.request.RequestDocumentation의relaxedRequestParameters메소드를 사용하여 문서화되지 않은 요청 파라미터들이 테스트 실패를 야기하지 않게 할 수 있다.
-
-
pathParameters를 사용함으로써 경로 파라미터를 문서화할 수 있다.
this.mockMvc.perform(get("/locations/{latitude}/{longitude}", 51.5072, 0.1275))  // 1
	.andExpect(status().isOk())
	.andDo(document("locations", pathParameters(  // 2
			parameterWithName("latitude").description("The location's latitude"),  // 3
			parameterWithName("longitude").description("The location's longitude")  // 4
)));-
latitude,longitude두 경로 파라미터를 가지는GET요청을 수행한다. -
org.springframework.restdocs.request.RequestDocumentation에 있는pathParameters를 사용하여 요청 경로 파라미터를 기술하는 문서 조각을 생산하도록 REST docs를 설정한다. -
org.springframework.restdocs.request.RequestDocumentation에 있는parameterWithName을 사용하여latitude파라미터를 문서화한다. -
longitude파라미터를 문서화한다.
- 문서 조각의 이름은
path-parameters.adoc이며, 파라미터를 기술하는 테이블을 포함하고 있다.-
MockMvc를 사용한다면, 경로 파라미터에 대한 문서화를 가능하게 해주기 위해서 반드시MockMvcRequestBuilders가 아닌RestDocumentationRequestBuilders에 잇는 메소드를 사용하여 요청하게 빌드해야한다.
-
- 본문 내에 문서화되지 않은 경로 요청 파라미터가 발견되면 테스트는 실패한다. 이와 비슷하게, 본문 내에서 문서화되어 있는 경로 요청 파라미터가 발견되지 않고 경로 요청 파라미터가 옵션으로 표시가 되지 않을 경우에도, 테스트가 실패한다.
- 경로 요청 파라미터를 문서화하기를 원하지 않을 경우, ignore로 표시해야 한다.
- 또는,
org.springframework.restdocs.request.RequestDocumentation의relaxedPathParameters메소드를 사용하여 문서화되지 않은 경로 요청 파라미터들이 테스트 실패를 야기하지 않게 할 수 있다.
- Multipart 요청의 부분들을 문서화하기 위해서
requestParts를 사용할 수 있다.
this.mockMvc.perform(multipart("/upload").file("file", "example".getBytes()))  // 1
	.andExpect(status().isOk())
	.andDo(document("upload", requestParts(  // 2
			partWithName("file").description("The file to upload"))  // 3
));-
file이라는 이름의 한 부분을 가지는POST요청을 수행한다. -
org.springframework.restdocs.request.RequestDocumentation에 있는requestParts메서드를 사용하여 요청의 부분들을 기술하는 문서 조각을 생산하기 위해 REST docs를 설정한다. -
org.springframework.restdocs.request.RequestDocumentation에 있는partWithName메서드를 사용하여file이라는 이름을 가진 부분을 문서화한다.
-
문서 조각의 이름은
reqeust-parts.adoc이며, request parts를 기술하는 테이블을 포함하고 있다. -
본문 내에 문서화되지 않은 request part가 발견되면 테스트는 실패한다. 이와 비슷하게, 본문 내에서 문서화되어 있는 request part가 발견되지 않고 request part가 옵션으로 표시가 되지 않을 경우에도, 테스트가 실패한다.
- request part를 문서화하기를 원하지 않을 경우, ignore로 표시해야 한다.
- 또는,
org.springframework.restdocs.request.RequestDocumentation의relaxedRequestParts메소드를 사용하여 문서화되지 않은 request parts들이 테스트 실패를 야기하지 않게 할 수 있다.
-
Request Part 본문
- request의 본문을 문서화하는 방법과 같이 request part의 본문을 문서화 할 수 있다.
MockMultipartFile image = new MockMultipartFile("image", "image.png", "image/png",
		"<<png data>>".getBytes());
MockMultipartFile metadata = new MockMultipartFile("metadata", "",
		"application/json", "{ \"version\": \"1.0\"}".getBytes());

this.mockMvc.perform(fileUpload("/images").file(image).file(metadata)
			.accept(MediaType.APPLICATION_JSON))
	.andExpect(status().isOk())
.andDo(document("image-upload", requestPartBody("metadata")));-
PayloadDocumentation에 있는requestPartBody메서드를 사용하여metadata라는 이름의 request part의 body를 포함하는 문서 조각을 생산한다. - 문서 조각의 이름은
request-part-${part-name}-body.adoc형식이며, parts의 body를 기술하는 테이블을 포함하고 있다.- 위의 코드의 결과 :
request-part-metadata-body.adoc
- 위의 코드의 결과 :
MockMultipartFile image = new MockMultipartFile("image", "image.png", "image/png",
		"<<png data>>".getBytes());
MockMultipartFile metadata = new MockMultipartFile("metadata", "",
		"application/json", "{ \"version\": \"1.0\"}".getBytes());

this.mockMvc.perform(fileUpload("/images").file(image).file(metadata)
			.accept(MediaType.APPLICATION_JSON))
	.andExpect(status().isOk())
	.andDo(document("image-upload", requestPartFields("metadata",
fieldWithPath("version").description("The version of the image"))));-
PayloadDocumentation에 있는requestPartFields메서드를 사용하여metadata라는 request part의 본문에 있는 필드들을 기술하는 문서 조각을 생산한다. -
org.springframework.restdocs.payload.PayloadDocumentation에 있는fieldWithPath메서드를 사용하여version경로에 있는 필드를 예측한다. -
문서 조각의 이름은
request-part-${part-name}-fields.adoc형식이며, part의 필드들을 기술하는 테이블을 포함하고 있다.- 위의 코드의 결과 :
request-part-metadata-fields.adoc
- 위의 코드의 결과 :
-
본문 내에 문서화되지 않은 필드가 발견되면 테스트는 실패한다. 이와 비슷하게, 본문 내에서 문서화되어 있는 필드가 발견되지 않고 필드가 옵션으로 표시가 되지 않을 경우에도, 테스트가 실패한다.
- 필드를 문서화하기를 원하지 않을 경우, ignore로 표시해야 한다.
- 또는,
org.springframework.restdocs.payload.PayloadDocumentation의relaxedRequestPartFields메소드를 사용하여 문서화되지 않은 필드들이 테스트 실패를 야기하지 않게 할 수 있다.
plugins {
    id 'org.asciidoctor.jvm.convert' version '3.2.0'  // 1
}

configurations {
    asciidoctorExtension  // 2
}

dependencies {
    asciidoctorExtension 'org.springframework.restdocs:spring-restdocs-asciidoctor'  // 3
    testImplementation 'org.springframework.restdocs:spring-restdocs-mockmvc'  // 4
}

ext {
    snippetsDir = file('build/generated-snippets')  // 5
}

asciidoctor {
    configurations 'asciidoctorExtension'  // 6
    inputs.dir snippetsDir  // 7
    outputDir file('build/docs/html5')  // 8
    dependsOn test  // 9
}

test {
    outputs.dir snippetsDir  // 10
    useJUnitPlatform()  // 11
}

task copyHTMLDocument(type: Copy) {
    dependsOn asciidoctor  // 12
    from "${asciidoctor.outputDir}"  // 13
    into "src/main/resources/static/docs"  // 14
}

build {
    dependsOn copyHTMLDocument  // 15
}

bootJar {
    dependsOn asciidoctor  // 16
    from ("${asciidoctor.outputDir}") {  // 17
        into 'static/docs'  // 18
    }
}-
Asciidoctor 플러그인 적용
-
org.asciidoctor.convert사용 하고./gradlew build --warning-mode all로 빌드 시, 아래와 같은 권고문이 나오기 때문에 새로운 버전을 적용하기 위해서org.asciidoctor.jvm.convert을 사용했다.

-
-
Asciidoctor Gradle plugin's documentation에서 나와있듯이,
org.asciidoctor.jvm.convert플러그인 사용 시 디폴트로asciidoctor설정이 생성되지 않기 때문에, 설정을 정의해준다. -
asciidoctorExtension 설정에 있는
spring-restdocs-asciidoctor에 의존성을 주입해준다..adoc파일에서 사용할 문서 조각 속성들이build/generated-snippets을 가리키게 설정된다. -
testImplementation 설정에 있는
spring-restdocs-mockmvc에 의존성을 주입해준다.-
WebTestClientorREST Assured를 사용한다면,spring-restdocs-webtestclientorspring-restdocs-restassured를 사용하면 된다.
-
-
생성된 문서 조각들에 대한 출력 위치를
snippetsDir로 설정한다. -
플러그인을 사용하기 위해 3에서 주입받은
asciidoctorExtension으로 설정해준다. -
asciidoctor의 입력 디렉토리를
snippetsDir로 설정한다. -
asciidoctor의 출력 디렉토리를
build/docs/html5로 설정한다.- default는
버전 1.x는build/asciidoc/html5였지만버전 3.x는build/docs/asciidoc다. 참조 링크
- default는
-
문서가 생성되기 전 모든 테스트가 실행될 수 있게 하기 위해서 asciidoctor의 작업을
test작업에 의존하게 설정한다.- 즉, test 작업 수행 후 → asciidoctor 작업 수행
-
test작업 출력 디렉토리를snippetsDir로 설정한다. -
JUnit을 사용하게 설정한다. -
asciidoctor 작업 수행 후,
copyHTMLDocument작업이 수행되게 한다. -
asciidoctor의 출력 디렉토리에 있는 파일들을
-
src/main/resources/static/docs디렉토리로 복사한다.- 절대 경로로 하지 않고
static/docs로 지정할 경우, 최상위에static/docs가 별도로 생성된다.
- 절대 경로로 하지 않고
-
copyHTMLDocument작업 수행 후, build하게 한다. -
jar이 생성되기전에 문서가 생성되는 것을 보장하게 한다.- 즉, asciidoctor 작업 수행 →
jar생성
- 즉, asciidoctor 작업 수행 →
-
asciidoctor의 출력 디렉토리에 있는 파일들을
-
jar의static/docs디렉토리로 복사한다.
-
bootJar작업만 정의한 글,bootJar작업을task(나의 경우에는 copyHTMLdocument) 작업으로 대체를 해주었다는 글,bootJar작업과task작업 모두 수행하는 글들을 보게 됐는데, 이러한 작업이 수행하는 일을 명확하게 기술하지 않거나 조금씩 다르게 설명이 되어있었다. 각기 다른 내용들을 보면서 혼란스러워 직접 테스트해 본 후 왜 사용하는지에 대해서 정리해보기로 했다. - 테스트를 해본 결과
bootJar작업을 정의하지 않을 경우,jar파일로 프로젝트 실행 시 문서가 존재하지 않게 되어 문서 접근이 불가능해지기 때문에, 꼭bootJar작업을 정의해줘야 한다. - ex)
jar파일 생성 및 실행./gradlew bootjarcd build/libsjava -jar kodesalon-0.0.1-SNAPSHOT.jar- http://localhost:8080/docs/index.html 실행 시
-
bootJar작업을 정의하지 않을 경우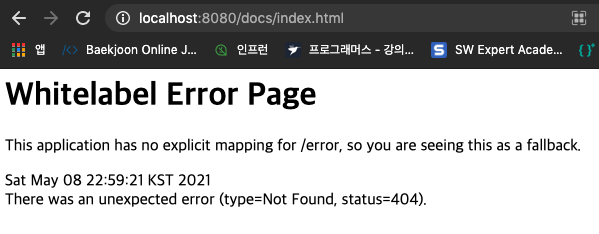
-
jar xvf kodesalon-0.0.1-SNAPSHOT.jar로 확인 결과,static/docs폴더는 물론 문서도 존재하지 않는다.
-
-
bootJar작업을 정의한 경우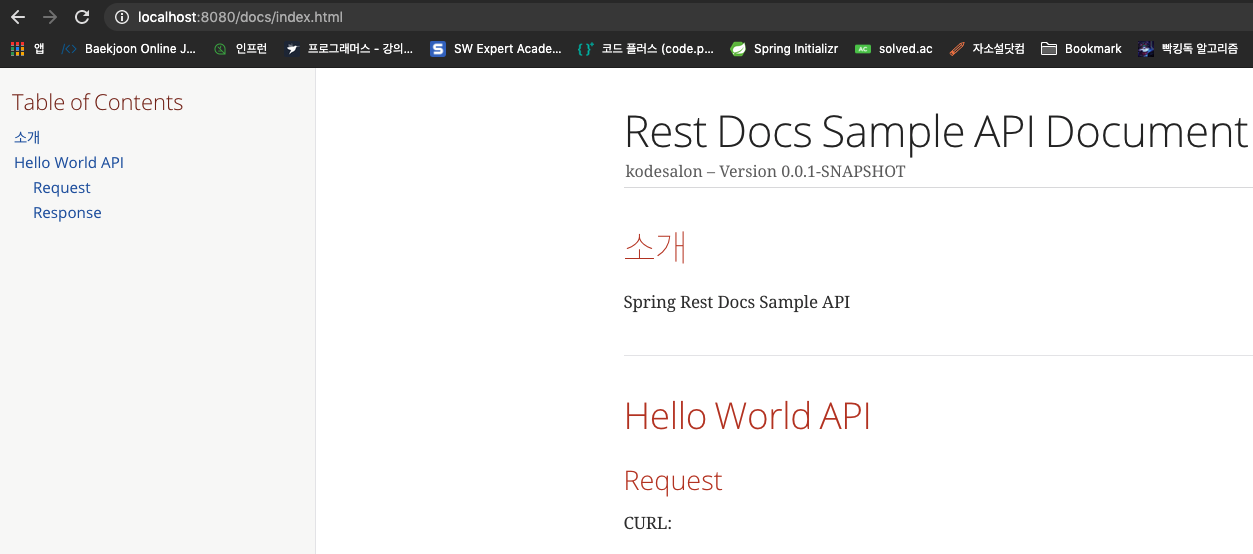
-
jar xvf kodesalon-0.0.1-SNAPSHOT.jar로 확인 결과,static/docs폴더, 문서 모두 존재한다.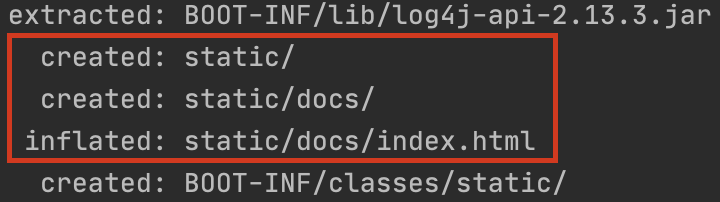
-
-
task(copyHTMLDocument) 작업은, 개발 환경에서 조금 더 쉽게 문서를 확인하기 위해서 빌드 시src/main/resources/static/docs로 파일을 복사해주는 작업이라고 생각하면 된다. 그러므로 꼭 해주지 않아도 된다. 왜냐하면/build/docs/html5에 원하는 문서들이 존재해있기 때문이다.
@SpringBootApplication
public class KodesalonApplication {

	public static void main(String[] args) {
		new SpringApplication(KodesalonApplication.class).run(args);
	}

	@RestController
	private static class SampleController {

		@RequestMapping("/")
		public String index() {
			return "Hello, World";
		}
	}
}@ExtendWith({RestDocumentationExtension.class, SpringExtension.class}) // 1
@SpringBootTest
class KodesalonApplicationTests {
@Autowired
private WebApplicationContext context;
private MockMvc mockMvc;
@BeforeEach // 2
public void setUp(RestDocumentationContextProvider restDocumentation) {
this.mockMvc = MockMvcBuilders.webAppContextSetup(context)
.apply(documentationConfiguration(restDocumentation)).build();
}
@Test // 3
public void sample() throws Exception {
this.mockMvc.perform(get("/"))
.andExpect(status().isOk())
.andDo(document("sample"));
}
}- JUnit 5 Configuration
- JUnit 5에서 문서 조각들을 생성하기 위해,
RestDocumentationExtension.class를 추가해줘야 한다. -
RestDocumentationExtension.class는 자동으로 출력 디렉토리/build/generate-snippets에 설정되어 있다. - 일반적으로 Spring 테스트를 할 때
SpringExtension.class도추가해줘야 한다. -
JUnit 5.1을 사용하는 경우 클래스 필드로 등록함으로써 출력 디렉토리를 임의로 오버라이드 할 수 있다.
@RegisterExtension
final RestDocumentationExtension restDocumentation = new RestDocumentationExtension ("custom");-
@BeforeEach에MockMvc인스턴스 설정
-
MockMvcRestDocumentationConfigurer를 사용함으로써MockMvc인스턴스가 설정이 된다.-
org.springframework.restdocs.mockmvc.MockMvcRestDocumentation에 있는documentationConfiguration()로 부터 해당 클래스의MockMvcRestDocumentationConfigurer인스턴스를 얻을 수 있다. -
MockMvcRestDocumentationConfigurer은 사용자 커스텀 설정을 위한 API도 제공한다.
-
- Junit을 사용하지 않는 테스트를 설정하는 경우에는 해당 링크 참조
- RESTful 서비스 호출
-
설정되어 있는 출력 디렉토리 내부
sample라는 이름을 가진 디렉토리에 문서 조각들이 작성이 되면서 서비스 호출이 문서화 된다.-
{class-name},{method-name}과 같은 예약어를 통해서도 경로를 설정할 수 있다. - 문서 조각들은
RestDocumentationResultHandler에 의해 작성된다. -
org.springframework.restdocs.mockmvc.MockMvcRestDocumentation에 있는document()메소드로부터 해당 클래스의RestDocumentationResultHandler인스턴스를 얻을 수 있다.
-
-
기본적으로 6개의 문서 조각이 작성된다.
<output-directory>/index/curl-request.adoc<output-directory>/index/http-request.adoc<output-directory>/index/http-response.adoc<output-directory>/index/httpie-request.adoc<output-directory>/index/request-body.adoc<output-directory>/index/response-body.adoc- 그 외 생성되는 문서 조각들은 해당 링크 참조
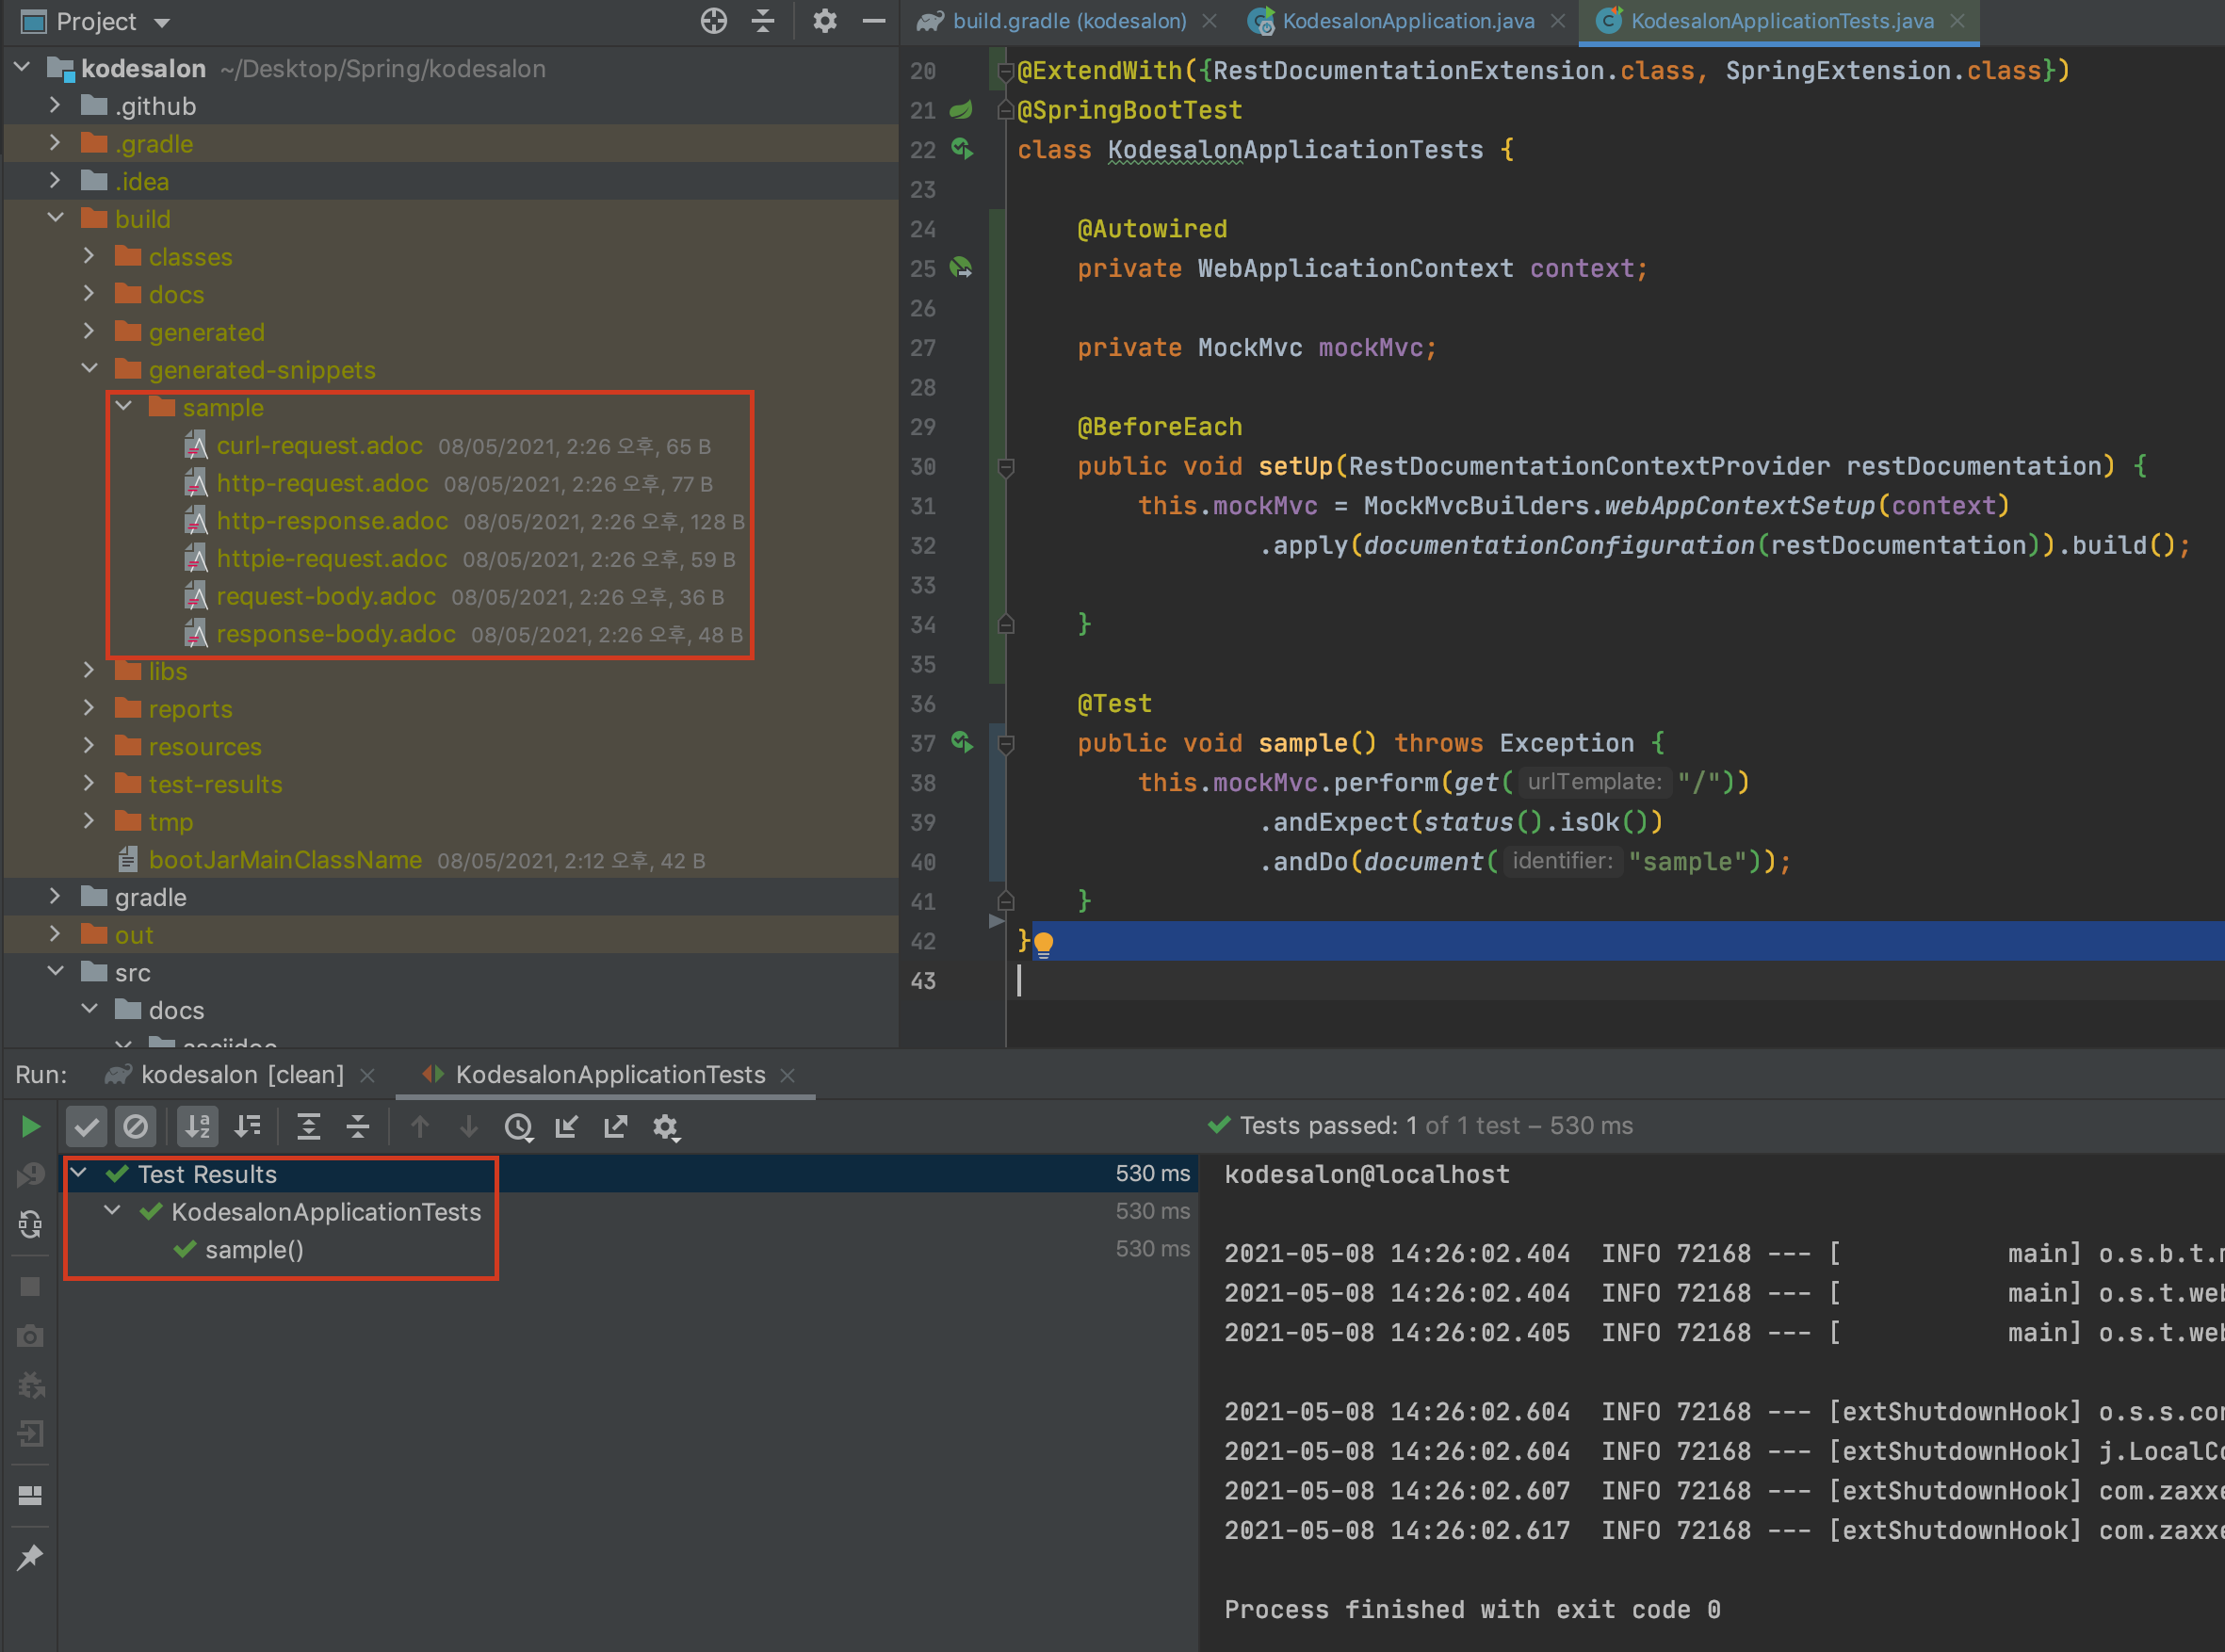
- 위와 같이
snippetsDir = file('build/generated-snippets')로 설정했던 디렉토리에sample디렉토리가 생성되고 내부에.adoc형식의 문서 조각들이 추가된다.
-
생성된 문서 조각을 사용하기 전에,
.adoc소스 파일을 만들어야 한다.- 접두사로
.adoc가 포함되면 어떤 이름으로 만들어도 상관없다.

-
src/docs/asciidoc경로에index.adoc이라는 파일을 만들어주었다.- 화면 오른쪽에 asciidoc 파일 결과를 미리볼 수 있게 해놓았는데 Plugin에서
AsciiDoc이라는 플러그인을 다운로드 해주면 된다.
- 화면 오른쪽에 asciidoc 파일 결과를 미리볼 수 있게 해놓았는데 Plugin에서
= Rest Docs Sample API Document  // 1
kodesalon;  // 2
:doctype: book  // 3
:icons: font  // 4
:source-highlighter: highlightjs  // 5
:toc: left  // 6
:toclevels: 3  // 7
:sectlinks:  // 8

[[introduction]]
== 소개
Spring Rest Docs Sample API

[[sample]]
== Hello World API

=== Request

CURL:

include::{snippets}/sample/curl-request.adoc[]

Request HTTP Example:

include::{snippets}/sample/http-request.adoc[]

=== Response

Response HTTP Example:

include::{snippets}/sample/http-response.adoc[]
-
=를 사용하여 Rest Docs Sample API Document 라는 이름의 문서 제목 작성 -
문서에 대한 헤더 정보로, kodesalon 이라는 프로젝트의 문서임을 명시
-
=사용 후, 아래에 공란이 포함되어 있으면 아래의 설정들이 적용되지 않는다.:doctype,:icons와 같은 설정들은 모두=바로 다음 또는=,헤더 정보다음에 바로 작성을 해주어야 한다. -
ex) 설정 적용이 안되는 예시
= Rest Docs Sample API Document
:doctype: book
:icons: font
-
-
:doctype: 문서 타입을 book 타입으로 적용 -
:icons: 아이콘 타입을 font 타입으로 적용 -
:source-highlighter: 문서에 표기되는 코드들의 하이라이팅으로 highlightjs 적용. -
:toc: toc (Table Of Contents)를 문서의 좌측에 배치 -
:toclevels: toc의 목차 단계를 3단계로 적용 -
:sectlinks:=,==,===와 같은 섹션에 링크를 부여-
=,==,===,====,=====,======- 섹션들의 제목을 명시할 때 사용
- HTML의
<h1>~<h6>와 비슷하다고 보면 된다.
-
-
[[텍스트]]- 해당 텍스트에
id,#태그를 부여 - 결과)
<h2 id="introduction"><a class="link" href="#introduction">소개</a></h2,<h2 id="sample"><a class="link" href="#sample">Hello World API</a></h2>
- 해당 텍스트에
-
include::{snippets}/sample/XXX.adoc[]- 포함하고 싶은 asciidoc 파일을 불러온다.
-
{snippets}은 build 설정에서snippetsDir = file('build/generated-snippets')부분을 가리킴
-
결과물인
HTML파일은 같은 이름을 가지지만 접두사.html를 가진다.
- 접두사로
-
터미널에서
./gradlew build또는 IntelliJ에서gradle - build하면 아래와 같은 파일들이 생성된다.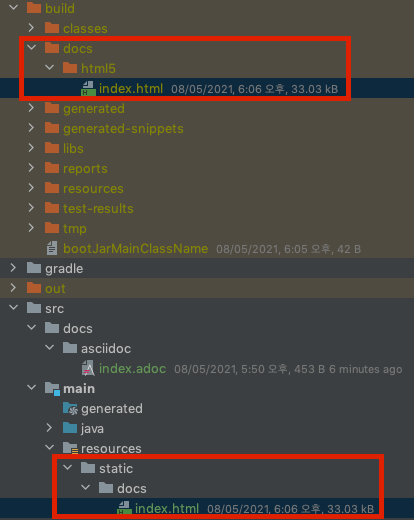
-
Spring 프로젝트 실행 뒤,
[localhost:8080/docs/index.html](http://localhost:8080/docs/index.html)로 접속하면 아래와 같이 문서를 확인할 수 있습니다.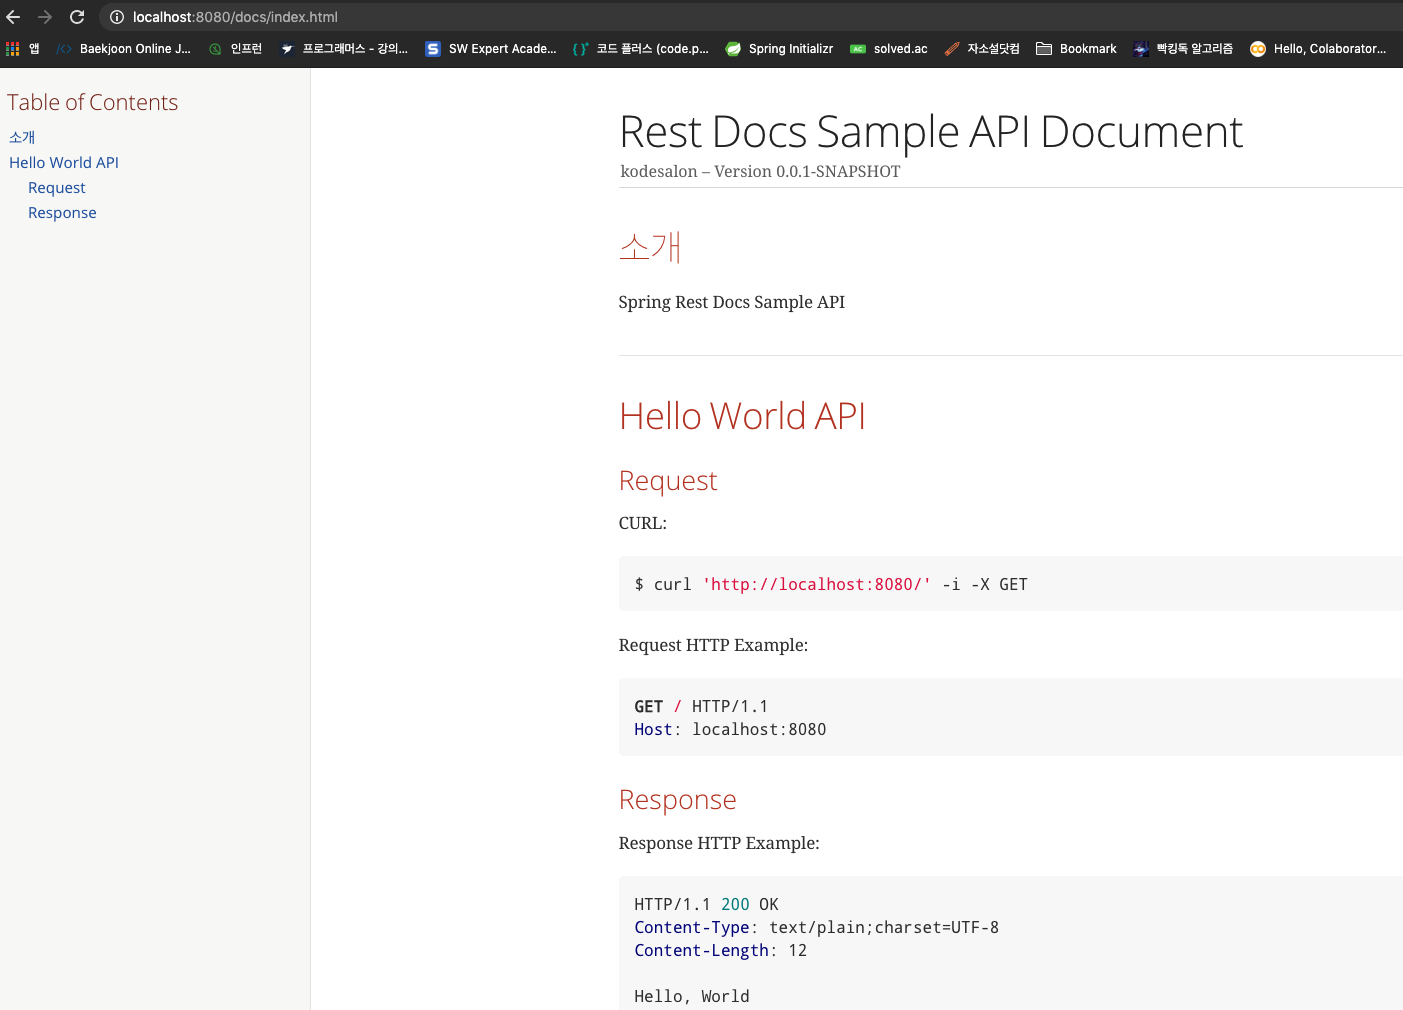
Introduction to Spring REST Docs - baeldung
Gradle Multi Module에서 Spring Rest Docs 사용하기
Spring Rest Docs를 이용한 API 문서 만들기